Getting to this final wrap-up has taken nearly as much time as the bathroom reno, itself! Not really, but it really dropped to the bottom of the list of many projects waiting patiently in the wings.
The day-to-day renovation is in my Facebook and Instagram posts — those daily posts served as a way to distract ourselves from the pandemic that arrived simultaneously on the day we started construction. Literally, the same freaking day the crew arrived, our state went on lockdown, except for essential services, of which home renovation and construction was deemed necessary. We thought this was a stroke of luck.
It was not.
We proceeded for the first week, back when we had the luxury of thinking all we had to do was wash our hands frequently. As our luck would have it, the renovation stopped nearly as soon as it started. A week later, we had a long conversation with the construction crew and asked them to take a few weeks off, until, you know, this whole thing blew over. Ha.
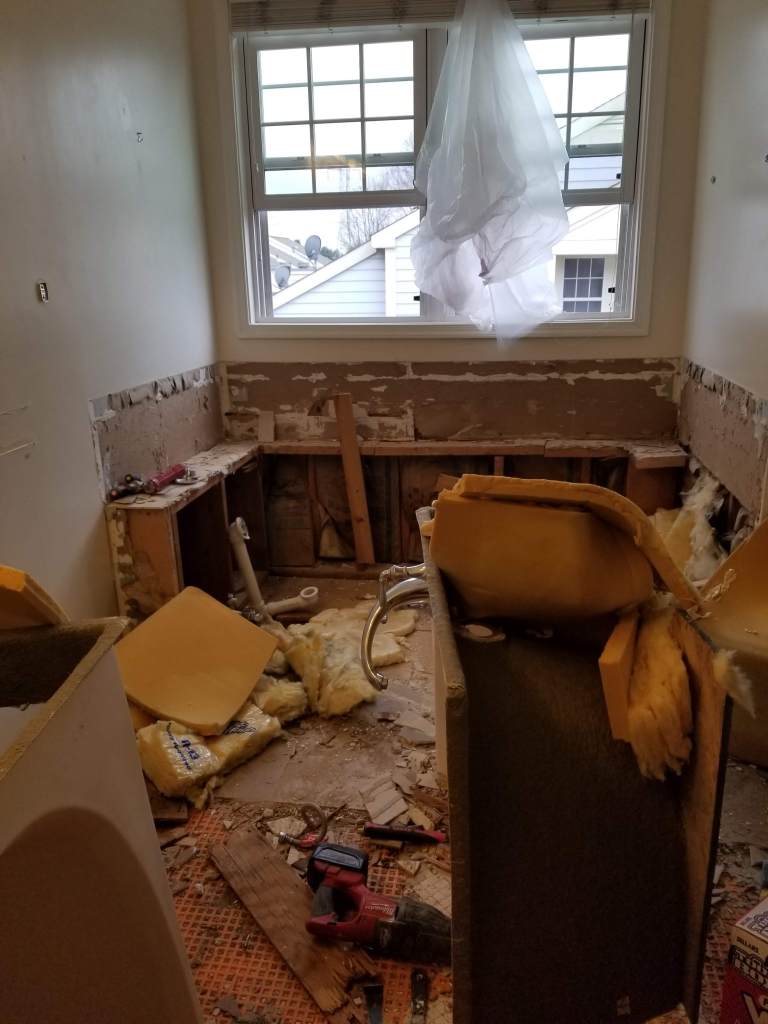
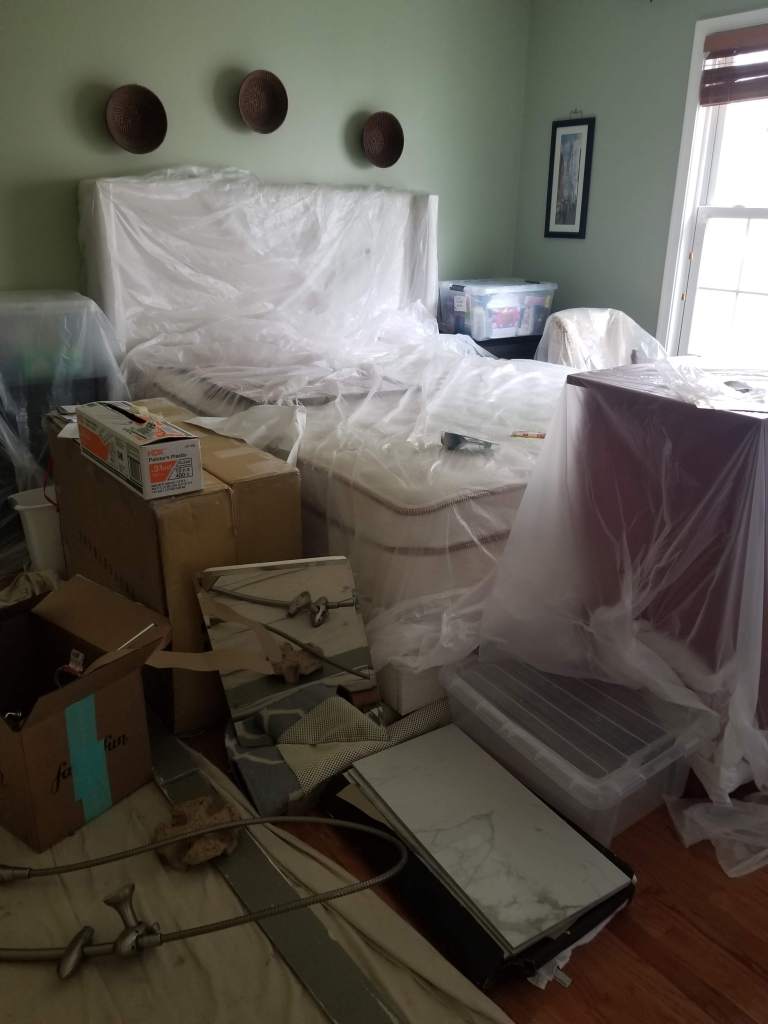
Of course, our bedroom, which is adjacent to the master bath, had already been turned into a construction zone, unusable and surrounded by dust-abating plastic curtaining while the bathroom had been stripped to the studs.
Within a week, we learned the crew had been furloughed and we would be housebound for the foreseeable future in a construction zone, with thick cardboard lining every hallway and room, a thin layer of dust coating every surface, and a massive amount of equipment left behind, taunting us with what could have been.
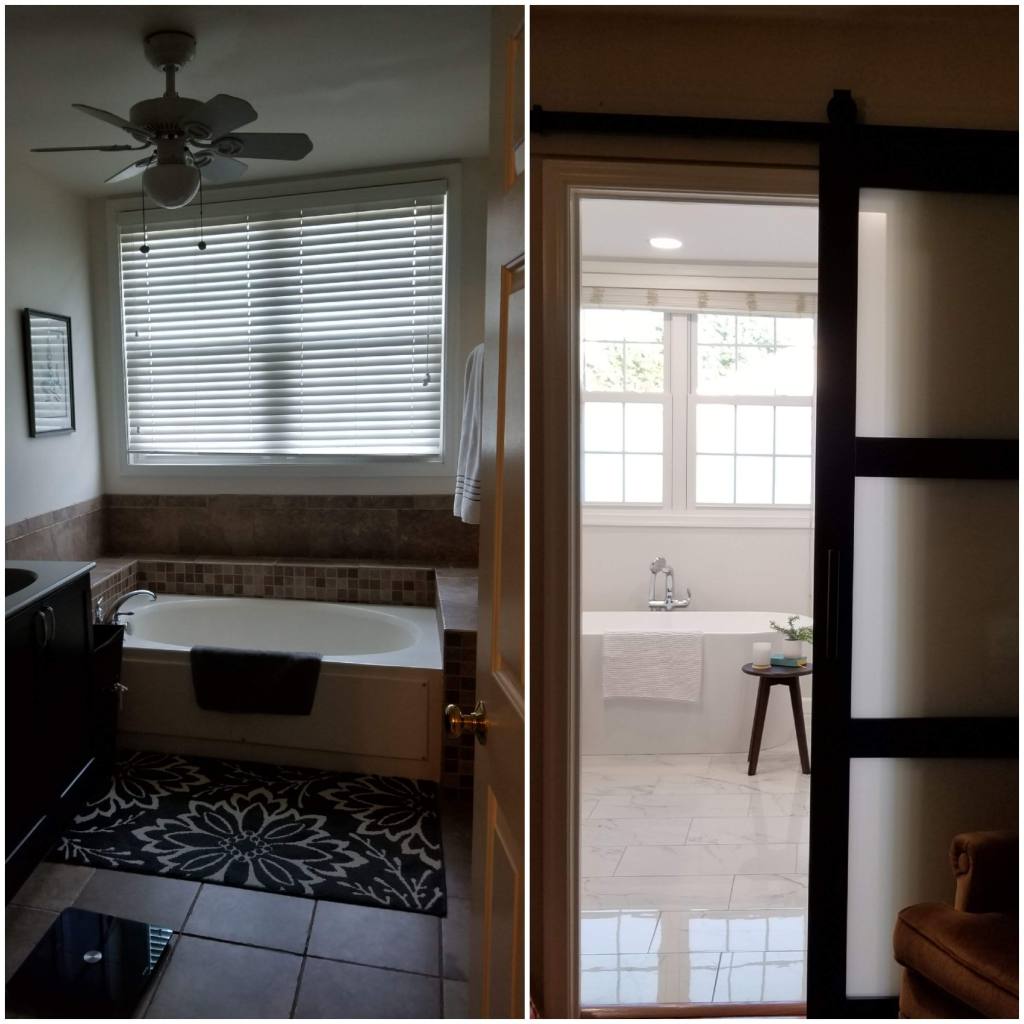
Cut to the chase: a month-long renovation turned into a three-month long renovation. I will save the psychological aftermath of having to share a bathroom with my spouse for the better part of three months for another day. In the meantime, here are the long-awaited final photos of the room!
Feel free to skip to the pretty pictures, but if you are planning to do a gut-reno of your master bath, there are also some lessons learned contained in this long construction diary.
Backstory
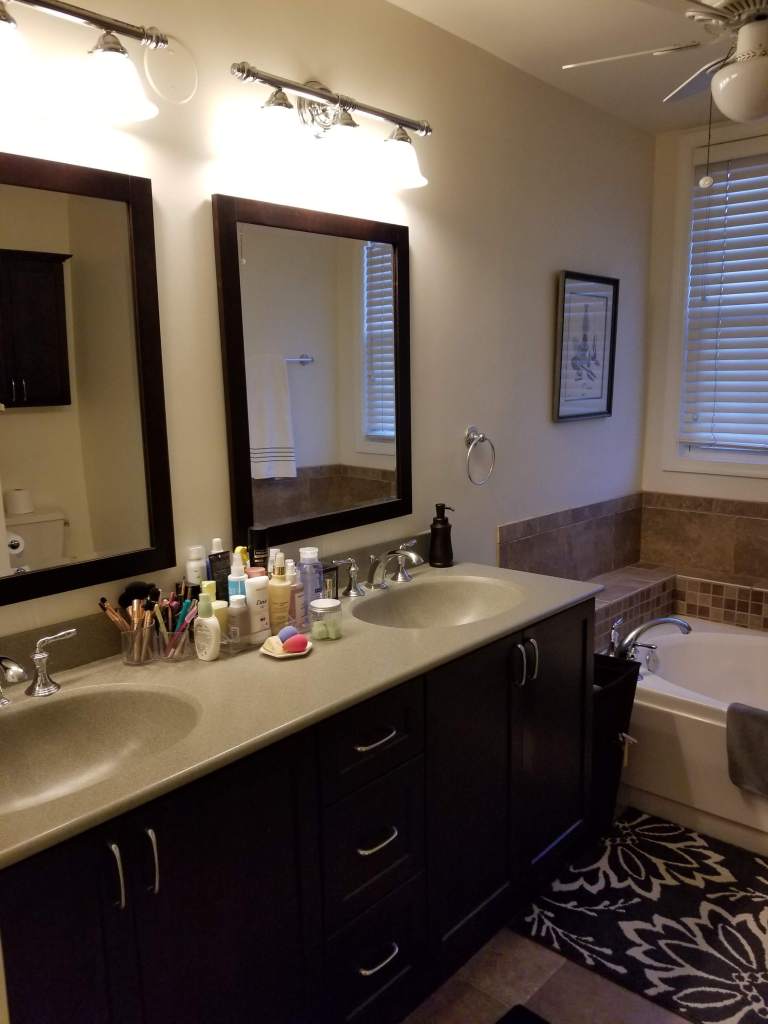
Almost as soon as we moved into this house, almost 10 years ago, we noticed something wrong with the then recently renovated master bath. The grout kept crumbling and the resulting stones and shards of concrete were less than pleasant (or safe) in a place where bare feet is a must.
Even so, we decided to embark on a major kitchen renovation two months after we moved in, and other projects eventually came along before we could indulge in a full-on master bath reno. Things like water heaters and HVACs and all those necessary, but decidedly un-sexy things a house apparently needs to function properly.
The years flew by, and one day, I noticed there was a sale on a vanity I had my eye on for a long time, and then the bathtub popped up on sale, too. I took that as a sign that my days of living with a poop-brown-colored bathroom were numbered.
The idea for a master bath renovation had been percolating in my brain for a long time, but the planning for it happened overnight, if I am being honest.
I had the basics down — I knew we wanted a super-duper long vanity, at least 72 inches, and we wanted a stand-alone tub to replace a 1980s-era sunken monstrosity surrounded by unfinished aforementioned poop-brown tile. Past that, we really did not have a clue.
Still, we called the contractor we had worked with on our kitchen reno and got on his schedule for March. We had three months to get our shit together and come up with a plan.
We thought we had fleshed out a skeleton plan with reusing our current semi-frameless shower doors, a pocket door for the entry, brushed nickel fixtures, and board and batten on the walls.
Spoiler alert: none of those things happened.
We went about creating a budget, which came in around $22,000, with us doing some of the work ourselves (like painting and baseboards.) Other bids we received were anywhere from $15K up to $35K (for the same FREAKING thing, mind you. Always get bids.) Since we knew and trusted our former GC, we knew we would likely use him again. That they were agreeable to us doing some of the work ourselves and having lots of day-to-day input without scowling (too much) was one of the deciding factors.
In the end, we came in about $400 over budget – I am nothing if not a budget-keeper, but full disclosure, we sold the old vanity and shower doors, so that helped us to stay close to budget. Incidentally, while our contractor was gracious enough to allow us to use his discount at some of his client stores, we purchased all of the furniture, fixtures, tile, and lighting ourselves, and oftentimes were able to beat the prices those stores gave us (even with his discount) by paying close attention to sales and scouring the internet for best buys, as well as a few other tricks we employed.
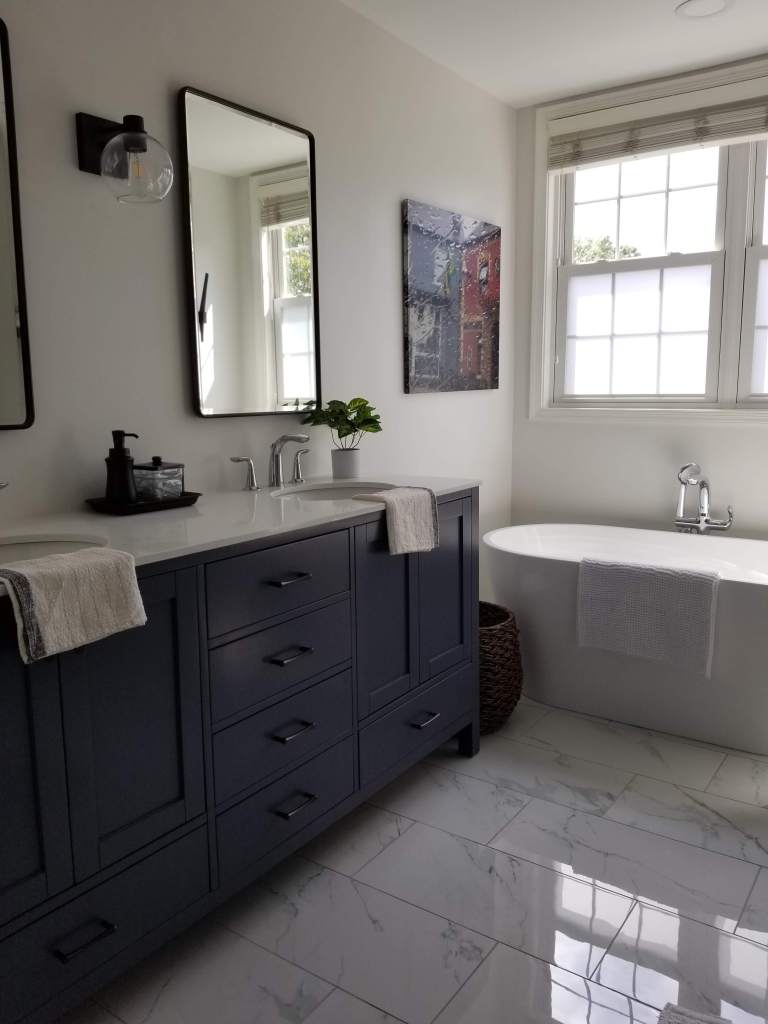
Vanity
Which comes first, the tile, the furniture, or the fixtures?
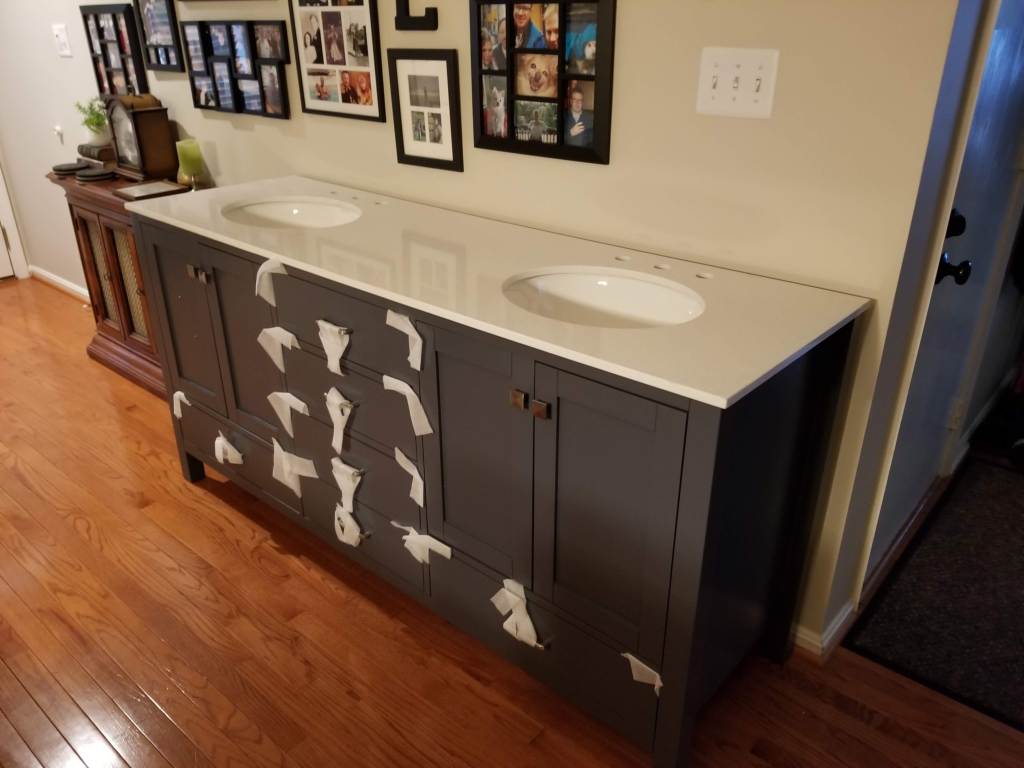
Who knows? For us, we went with the vanity first, since that was on sale, in the color we wanted, and came with a quartz top and porcelain bowls. We ordered it from Wayfair and were surprised to learn that the vanity was originally white labeled from Pottery Barn, at nearly half the price in hard-wood construction. (Pottery Barn listed the vanity at around $3,600. Wayfair usually has it listed right at $1,400, so when it popped up for sale at $1,200, I jumped.) Yay, us!
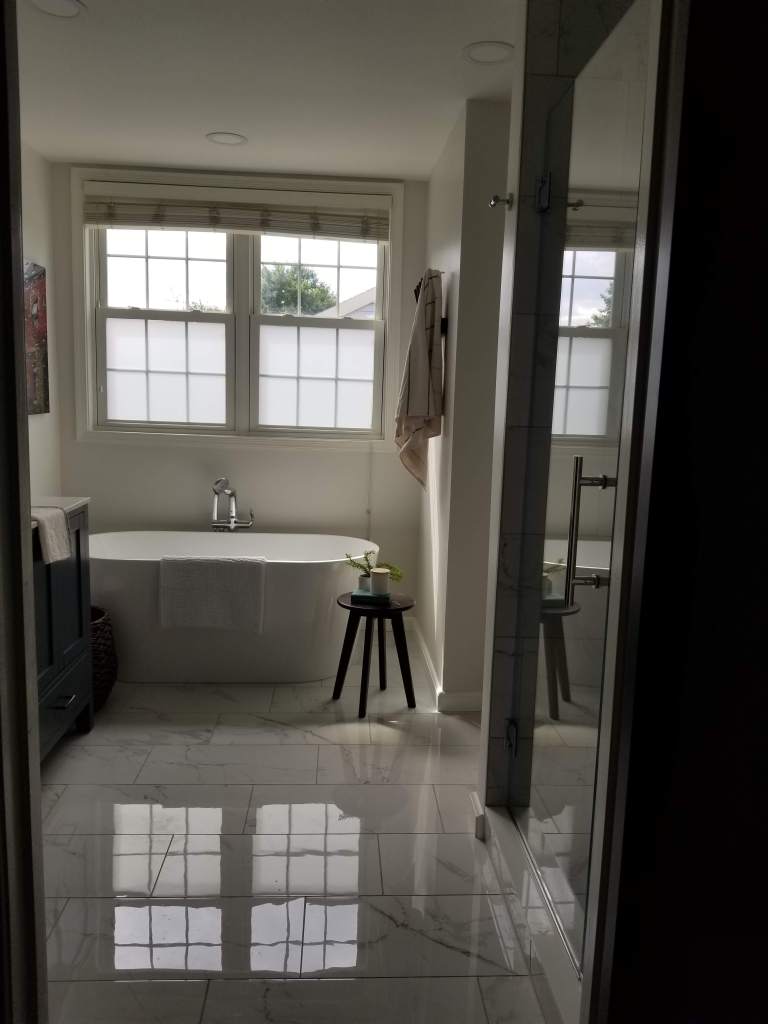
Next came the tub. I am short and knew I wanted a petite tub that I would not drown in, and this one fit the bill, leaving enough space at either end for an airy feel, rather than a built in tub. Nothing wrong with a built in tub, mind you, just not what we had in mind. It, too, was on sale.

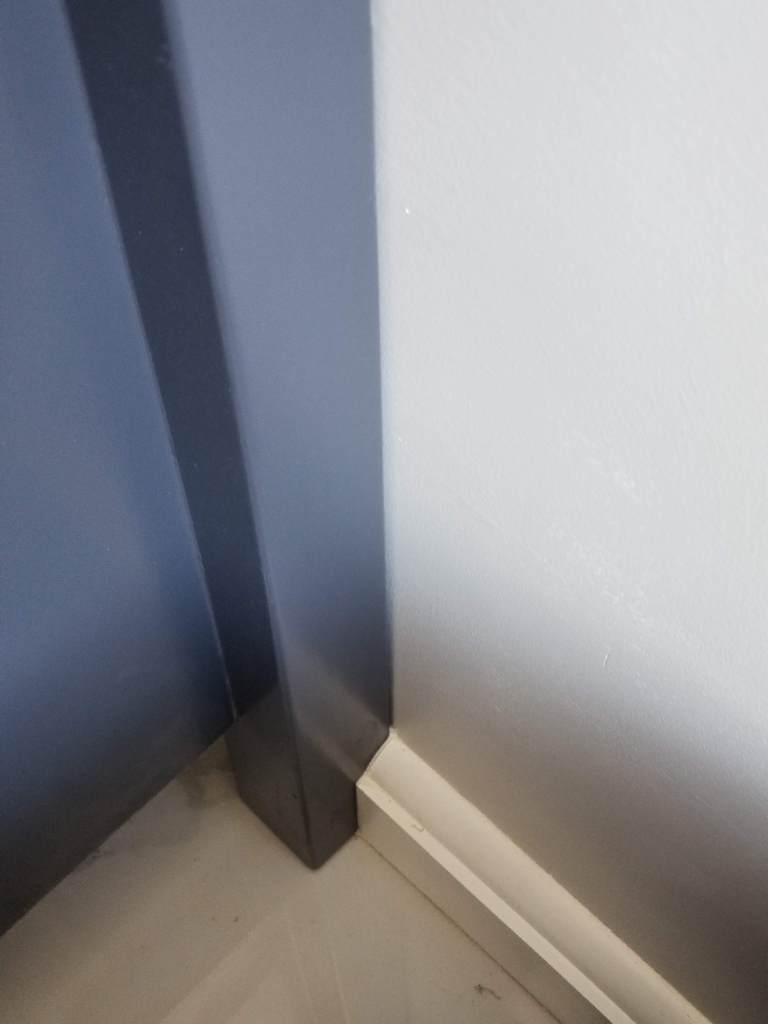
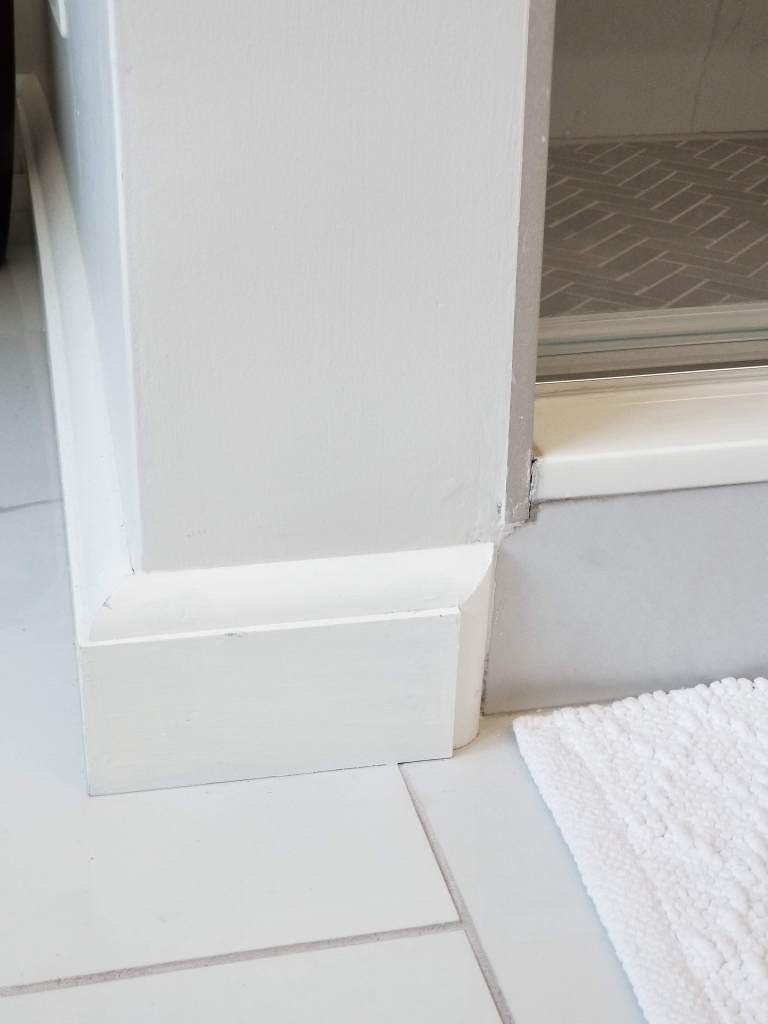
A few tidbits about our vanity placement. We did not want it anchored to one wall, the way you might find a typical vanity installed. We wanted it about 6-8 inches off the wall so that it would look like a piece of furniture. Our contractor suggested we leave enough space to get a mop/broom in between and it was good advice.
Second, we did not want a backsplash. Horrors, I know! I hate a backsplash. I just do. I hate the way it cuts a wall in half and just stops, like somebody forgot to finish tiling. We didn’t want the busy-ness of tiling the entire wall, either, though if our bathroom was a tad bigger, we might have considered it.
Instead, we had them use the reciprocal saw to carve out a part of our baseboard for the vanity legs so that the top of the counter would seat right against the wall. We then applied a crisp bead of caulk, and we were finished. The paint is in eggshell so completely wipeable, but after months of use now, it has not been an issue.
Tile
We went with carrara tile, with a high slip resistant rating. I get asked a lot about the slip factor with marble. Did you know tile is rated for slip resistance?
I can confirm that it is no more slippery than any other bathroom floor we have had had before. We got it on sale, so that added to our savings, as well. I knew I did not want to do a whole bunch of different tile in here, even though I know a lot people love mix and match floor tile and shower tile.
We thought that with only 110 sq ft to play with, keeping the same pattern would make for a much less cluttered appearance.
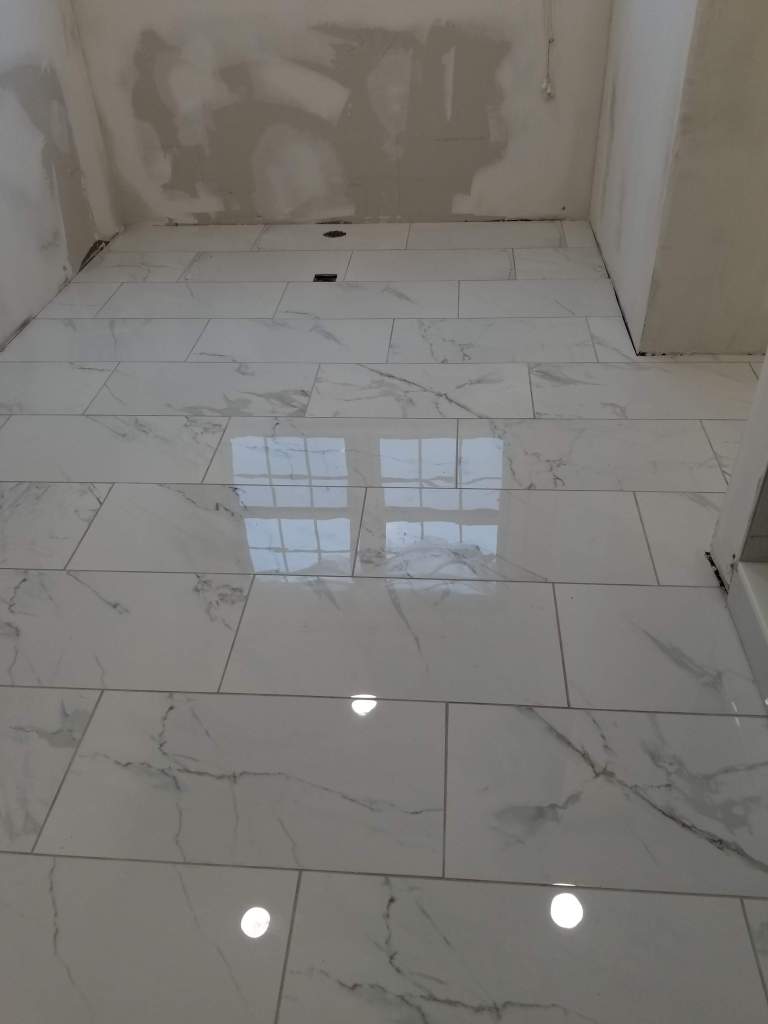
And, I thought our contractor would balk (he did) when I said I wanted 1/16” grout lines so it minimized the visual clutter. We eventually settled on 1/8” grout lines (for a number of technical reasons) and I think because we chose a warm gray grout, it works here.
The drawback to this tile is that it had unfinished edges, which meant that when it was laid on the edge of the shower wall, a raw edge would be facing out. Because our previous bathroom was a symphony of unfinished edges (do not do that!), we had to figure out a way to add a complementary border.
Some people do that with pencil tile or a bullnose piece that closely matches. I wanted ours to match exactly for that clean, uncluttered look, but finding a piece proved absolutely impossible. I know this because we visited every store known to humans (before the pandemic, of course.) Close enough was not cutting it for me – either the gray veining was to veiny, or the whites didn’t match.
We eventually heard about a product called Schluter edging from the tile store we used. Schluter is that little metal edging often used on the edge of tiles to cap it off. We turned ours sideways and it ended up being the EXACT color of our grout and looked like a finished piece of tile. Crisis averted.
One more thing about the tile placement – I wanted to do a one-third offset pattern on the floor and shower walls rather than a one-half offset pattern which I felt would leave the room with a lot of crosses. I also worked with one of the crew members to hand pick the pieces for placement so the veining matched the tile it was up against. A small, but worthy, detail for continuity’s sake. If you promise not to roll your eyes, I also insisted the tile veining lean the same way.
You rolled your eyes, didn’t you?
It was not a perfect process, and I can promise you the contractor might have grumbled a bit at this step, but the end result was totally worth the extra time.

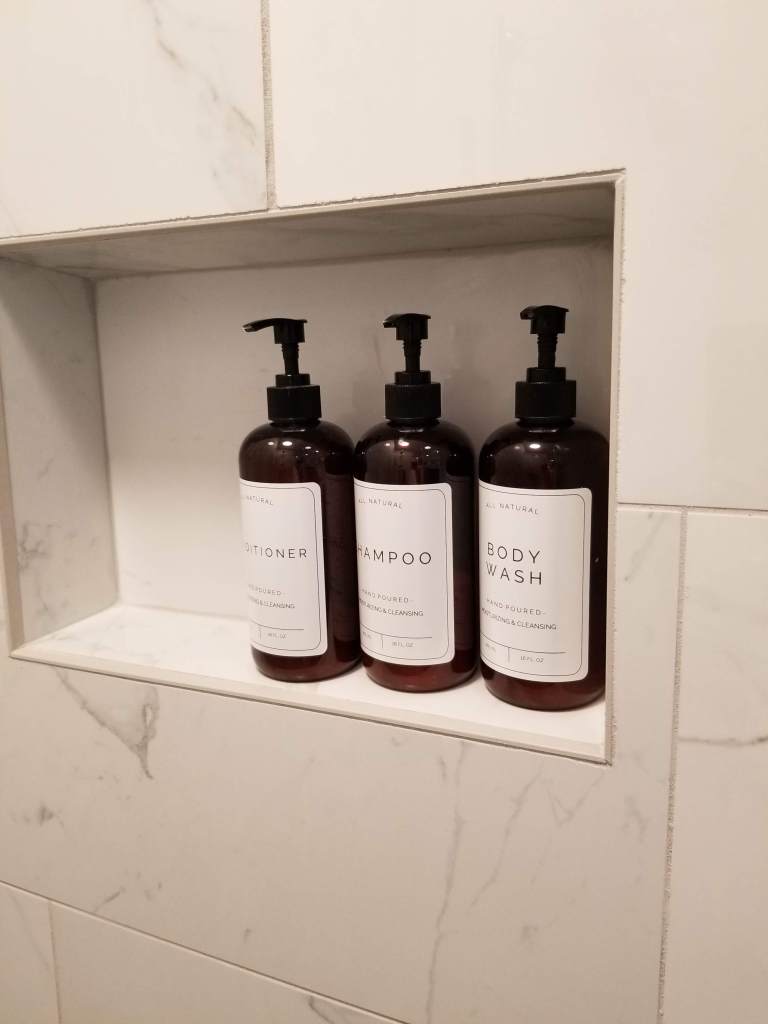
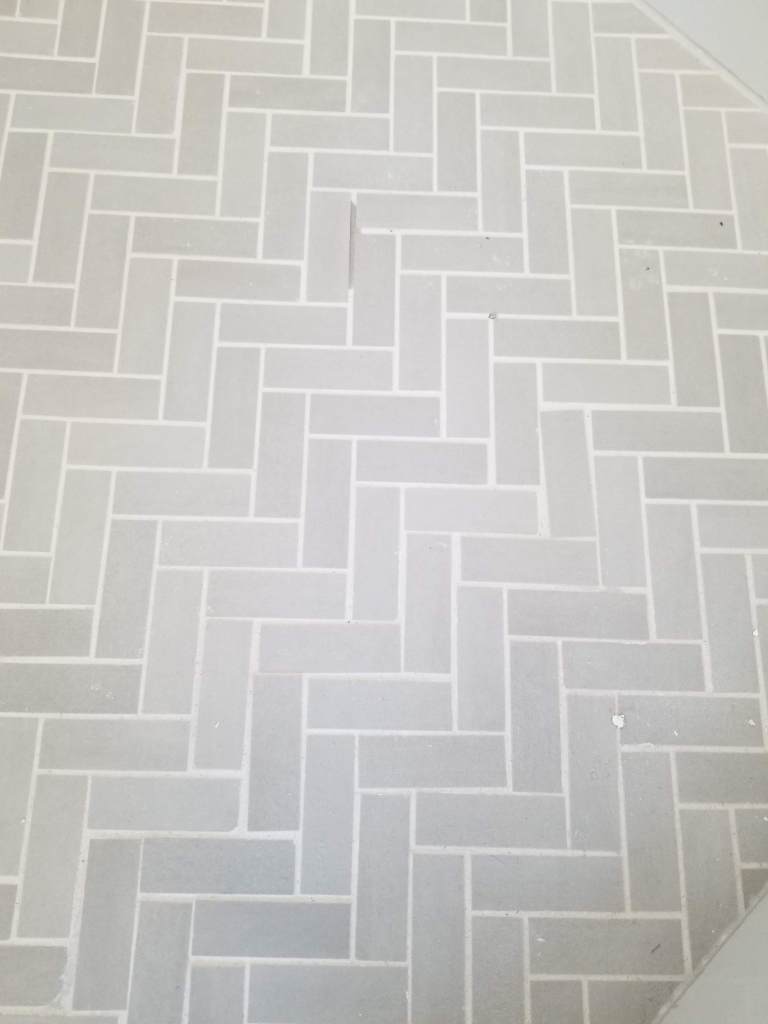
The one exception we made to using the same tile everywhere was to have a complementary tile for the shower floor in a different pattern. We went with a calming grey herringbone which adds subtlety, but interest. Many folks also choose to use the shower floor tile on the back of their shower cubby, but here again, we wanted clean lines and less pattern — not more — so we opted to use the same tile as the walls for the cubby walls and edge it with Schluter. The result is a clean aesthetic we are really happy with.
Shower doors
As I said, originally, we thought we would save some money by going with our semi-frameless shower. The ones on our old shower were quality shower doors and fairly new, after all. But, in the end, we wanted a high-end look and wanted shower doors that would not compete with other metals in the room. Because our shower box is on the smaller side, opening it up with clear glass would make the difference in a light and airy shower versus a dark cavernous one.
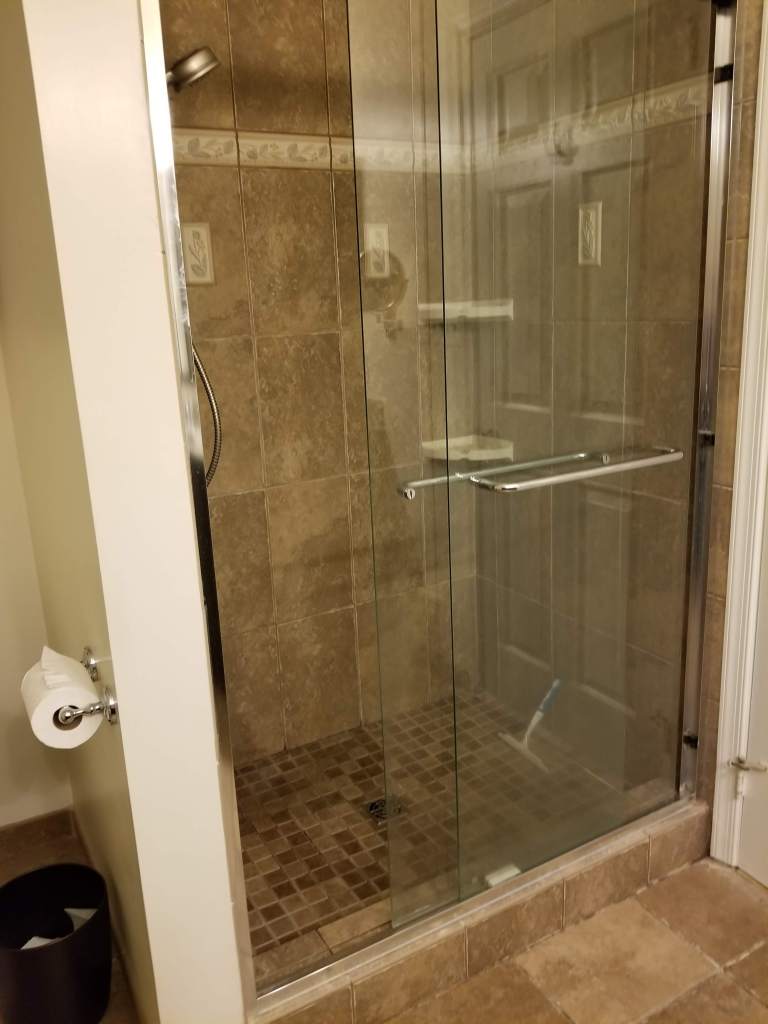
However, when the bid came in on the shower doors (we purchased them independently), we nearly chickened out. Around $2,000 for the frameless shower seemed insane, and this, along with the mirrors, would be our two big splurge items, but in the end, we cannot imagine having gone the original route.
One of the reasons the cost was high on the frameless is because we went with a low iron glass rather than a regular glass. You can tell a low-iron glass if it does not have a green coloring at the edge, kind of like a Coke bottle does. Low iron glass is completely clear without that tinge of green and because we chose white tile, we wanted its beauty to shine through, rather than be tinted green.

One word about frameless showers, you have to understand that you are going to be cleaning that glass with every flipping shower. It takes work to have pretty things, my mom used to say. She was not wrong. The glass needs to be squeejeed (is that a word??) with every shower, as I said. Once or twice a week, we must spray it down with this diamond guard stuff which “seals” the glass from getting water spots.
Would we do it again? In a heartbeat.
Heated floors
Because this bathroom is located above our garage, it is meat locker in the winter, and that temperature change, and what we later learned was incorrect mortar and grout mixing, likely contributed to the grout crumble we endured for all those years. On top of that, the floors were ice cold in the winter, and that made the master bedroom cold, too. So, we shopped around for a heated floor system and landed on one called Warm-Up that a neighbor had used and was happy with. Their customer service was terrific.
I had read somewhere that we should have two fuses installed when doing heated floors, so they sent me an extra one for the crew to install when they laid the floors. It is a smart and economical insurance policy (around $25) so that if the original fuse ever goes, you still have a workable one ready to take its place. I do not want to know what happens if they both go.
The floors were around $2,000, but we do not consider this one of our splurge items, as nice as they sound. It was necessary given the location of the bathroom.
A few notes from our contractor. Be very careful if you go with the orange blanket company (I can’t remember their name – maybe Schluter, like our edging?) Our GC says they continuously see failing tile work when using that system underneath.
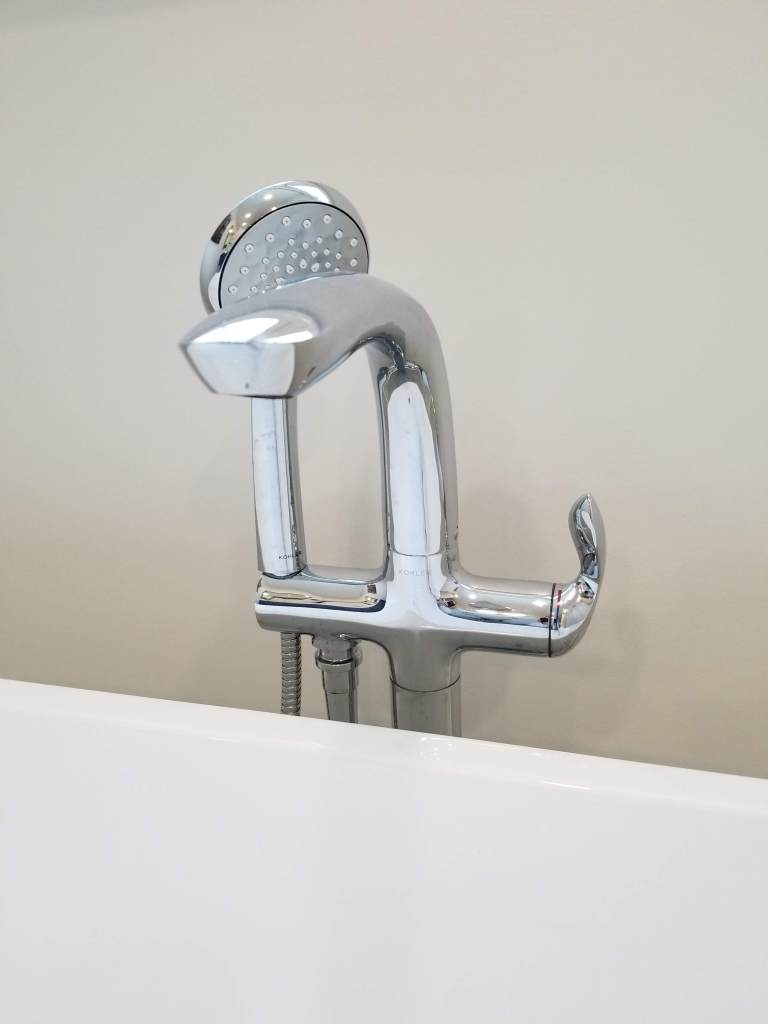
Fixtures
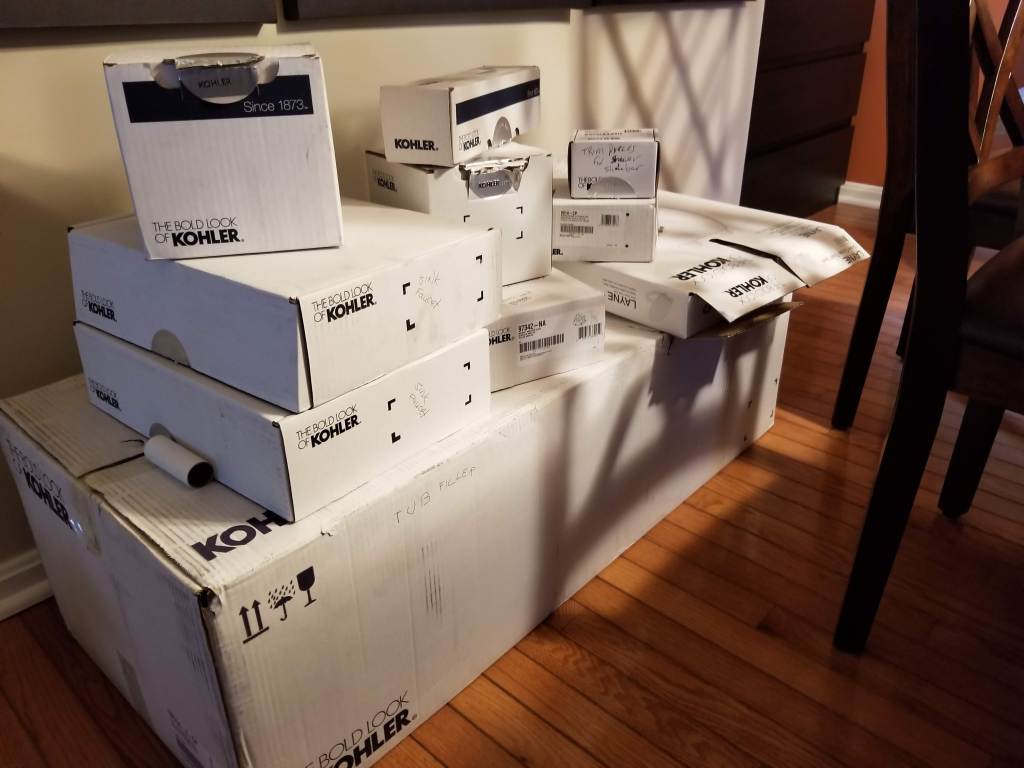
We have always had great success with Kohler products. Not only is their customer service terrific, when something goes wrong, they have always helped us walk through fixing it, even sending us replacement products when necessary, so we knew we would try to use them, if we could.
But, I need a tub filler and that was proving pricey and difficult to find one I liked. I have an aversion to the gooseneck tub fillers, but that style seems to corner the market. If I had my druthers, and code would have allowed it, I would have had the faucets placed on the wall under the windows. But, code says no faucets can be installed on an exterior wall. Womp. Womp.
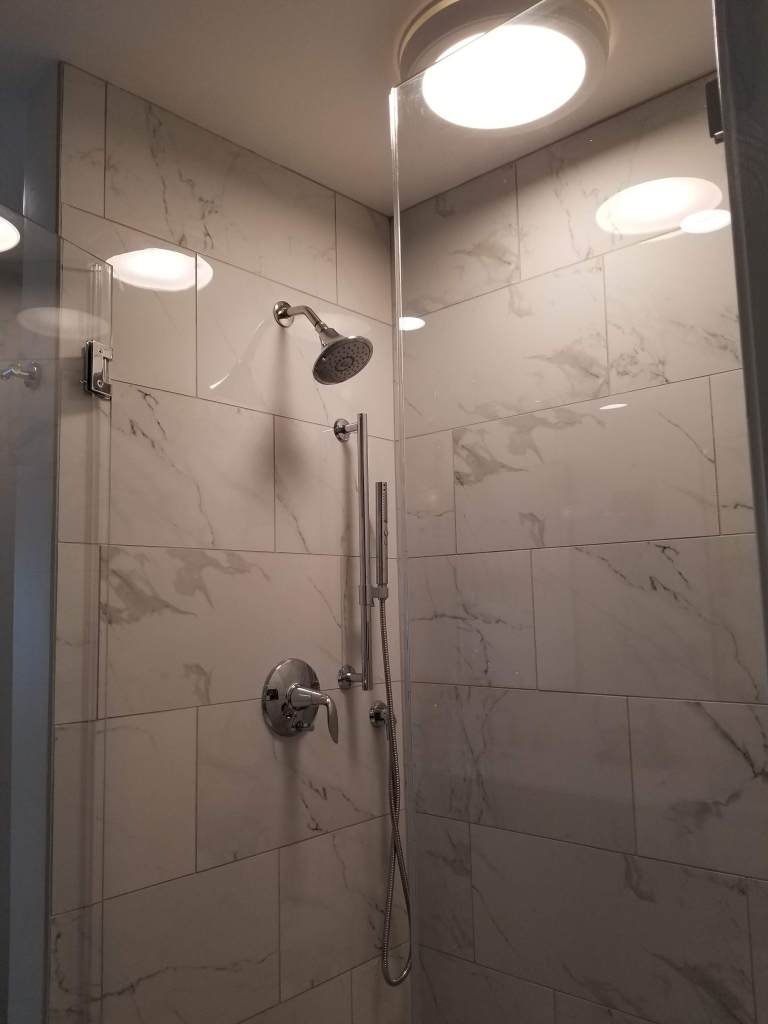
I knew I wanted to use the same faucet family for the shower, sinks, and tub, if possible – mostly because, again, we wanted to keep things calm and serene. I originally had my heart set on brushed nickel, but once I held it up against our cool gray tile, it fizzled. I also would have loved a dark bronze (brown), but it seemed trendy and possibly dating down the road.

In another life, I would have hopped on the black matte finish in a flipping heartbeat, but for this bathroom, it just didn’t work. So, in the end, we went with chrome. There is a reason this is a classic choice. The chrome pops against the tile and just gives a fresh, clean look to the room.
How crazy were we about finding the right fixtures? We had considered a road trip to Kohler, Wisconsin, home of the company, so we could view as many choices as possible with one of their designers. (Their designers are free if you go to the showroom.) And then, we dug a little deeper and realized they had a satellite showroom in Baltimore, just a 45-minute trek up the road.
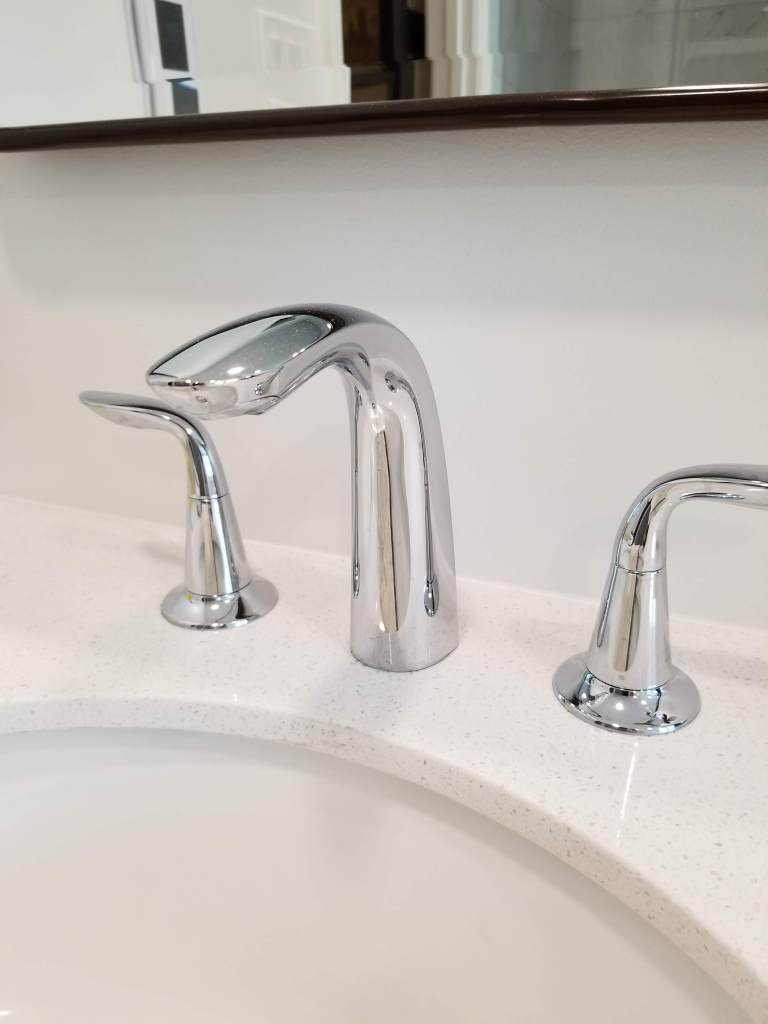
So, two weeks before the pandemic, in what would be our second to last outing before quarantine, we took the short trip and arrived minutes before the store opened. It was just as I had hoped — Disneyland for those of us who are obsessed with this stuff, and our designer was terrific, finding all the bits and bobs we needed (that we would not have realized we needed had we ordered from the internet.)

Not only that, she ordered it all for us to be delivered to our home and then whacked on an additional 25% discount for shopping in their showroom. Sold! Not gonna lie – these fixtures comprised one of the biggest ticket items in the budget, somewhere around $2,500, but we kind of love them.
Mirrors
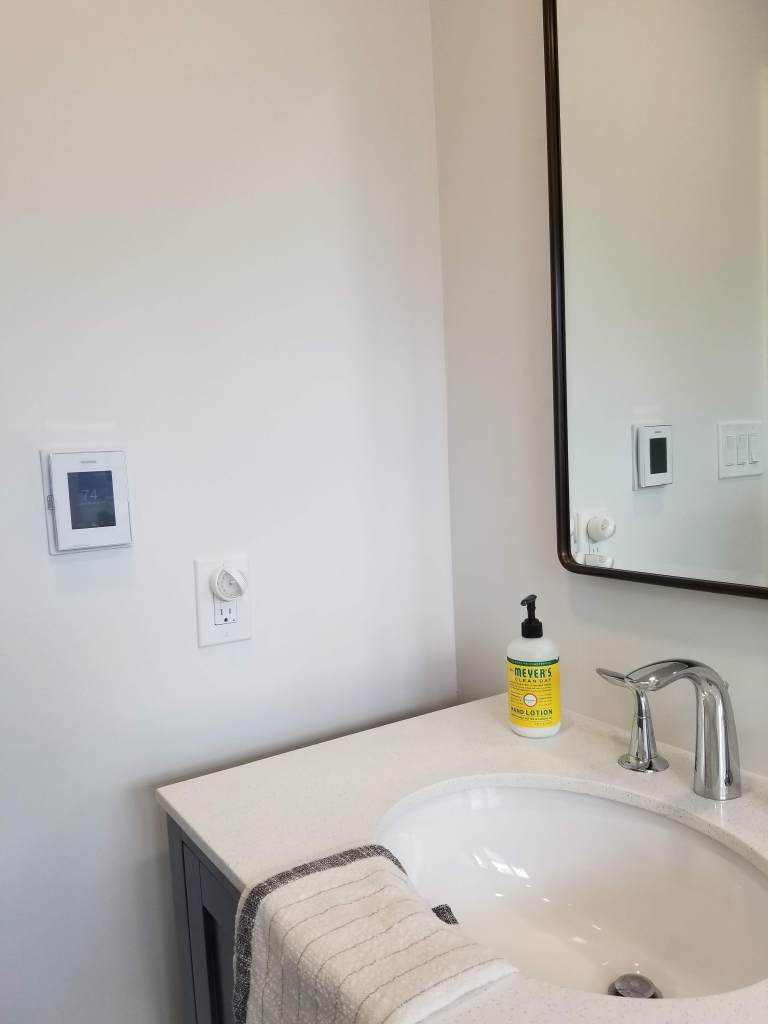
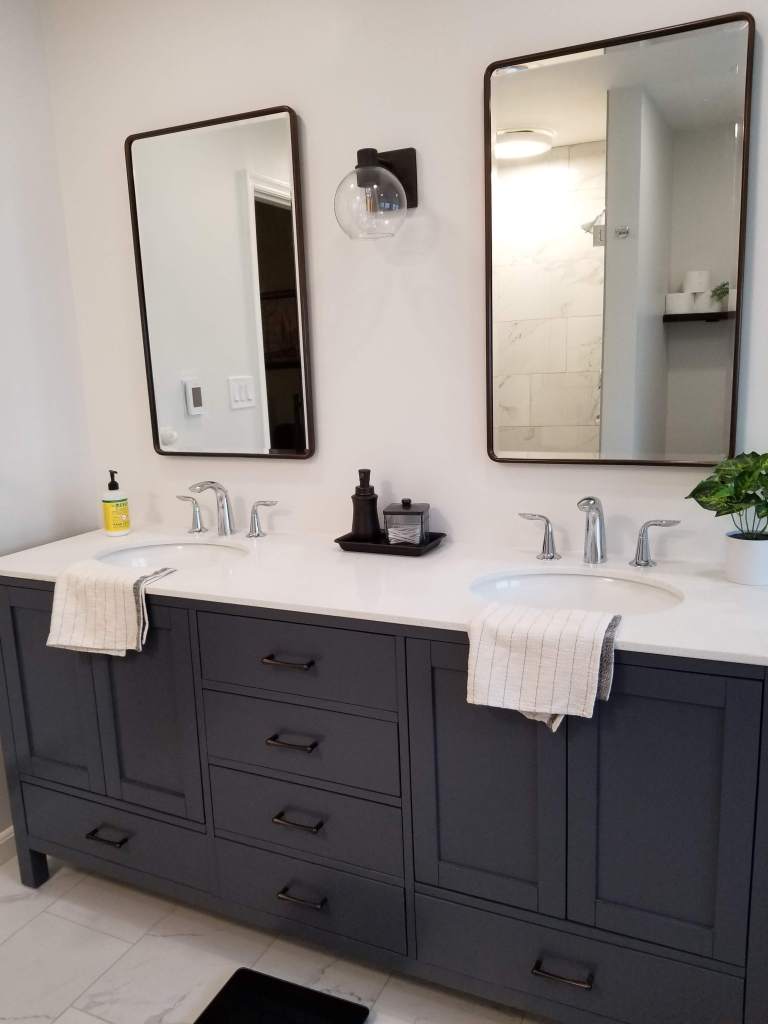
I mean, I knew I wanted these mirrors when I saw them, damn the price tag. They are vintage style, with rounded corner edges, and, sit down for this, they are actually medicine cabinets!
Not your grandmother’s medicine cabinet, mind you, but ones that fit tall bottles of hair spray and other products, and deep enough for jars, tubes, and whatever people keep in cabinets.

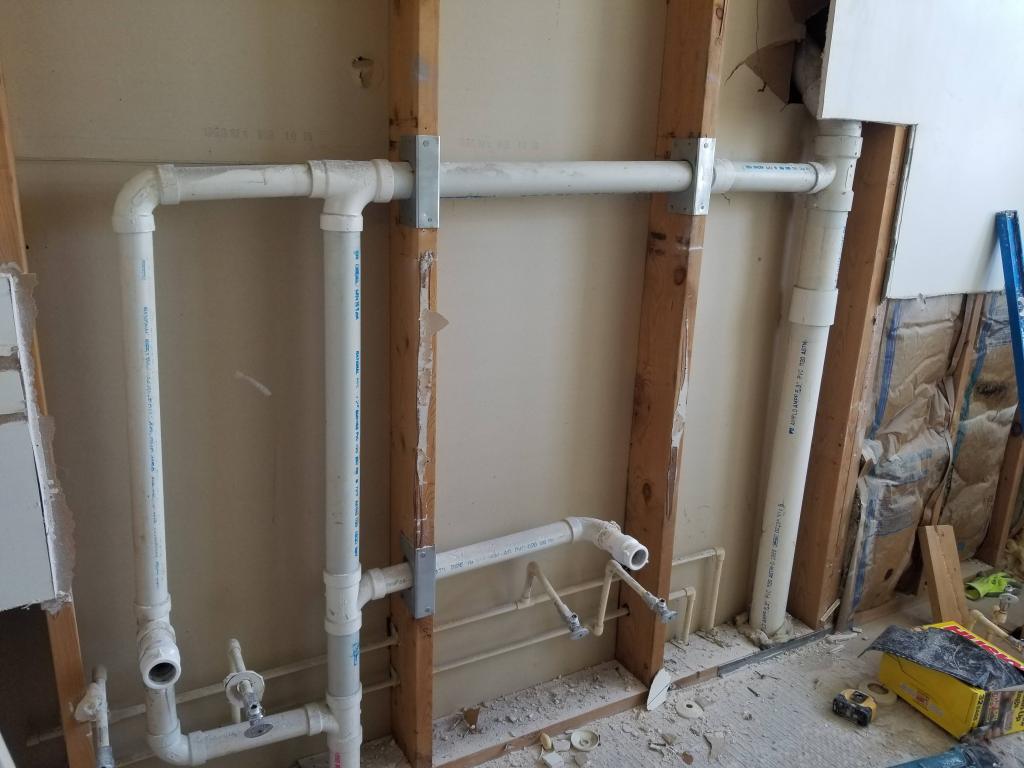
I also knew they were going to be a flipping headache to install. They are humongous – nearly two feet by three feet. We knew we wanted them recessed and installed flush with the wall, so that only we would know they opened. The only other alternative would have been to go with a tower cabinet at the end of the vanity, but I was afraid it would block the light and thus wanted to find another way to get more storage.

They had to open up the walls and cut into some studs, and much to our dismay, move some plumbing pipes to the tune of around $600, so this wasn’t an easy install.
At over $800 for the mirrors, and an additional $600 for the install, these were definitely a splurge. But, they do they job and they are gorgeous.
Lighting
We opted to use a shower light that doubles as a vent fan. I can’t remember the horsepower (is that the right word?) of the thing we ordered, but it probably is the one thing I’m least satisfied with. It works extraordinarily well and we will always go with a fan/light shower combo, but the one we chose looks like a space-ship. We were well into construction and this was a quick purchase. We can always change it and for now, it’s fine, but it is on a short lifespan in this bathroom.
We installed five LED cans and again, I cannot remember what we used, but these things are awesome. They are very thin, just an inch or so deep, come with a switch so you can change the tone of the light before they put them in the ceiling, and, as I said, they last forever as an LED light. They are also dimmable, so we put them on a dimmer switch as they are very bright. To be honest, it is nice to have them, but we rarely use them.
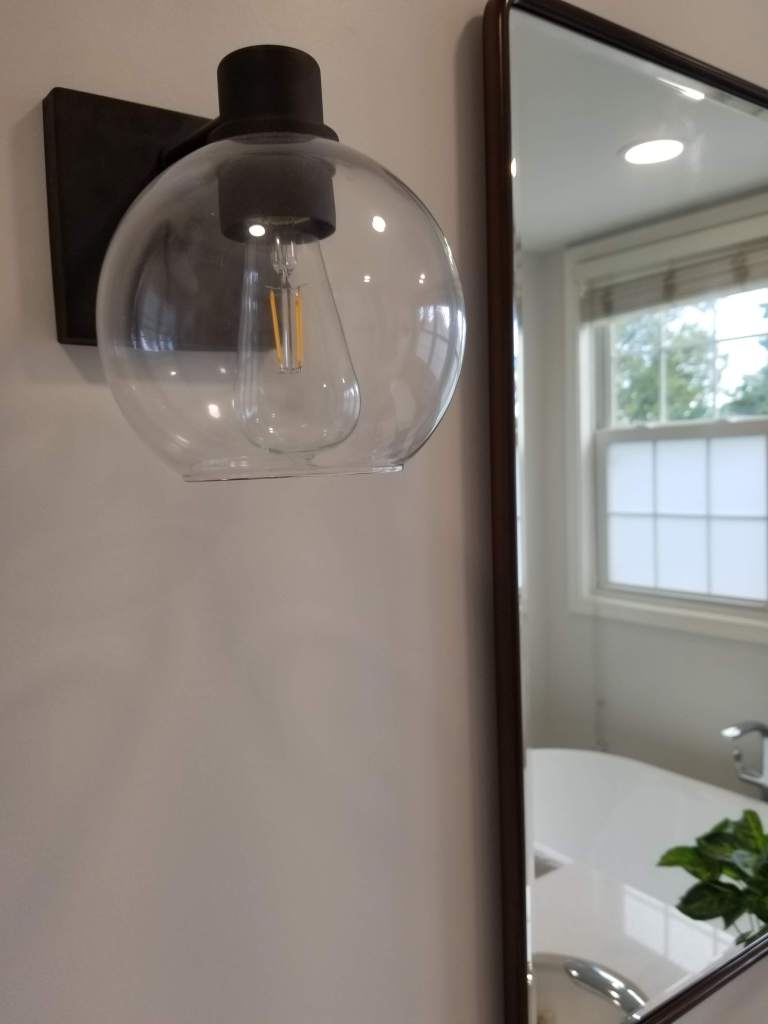
Instead, we use the fixture that is between the mirrors, also on a dimmer. We chose this fixture because of its clear glass cover and we opted used a vintage-looking bulb inside. Simple and clean looking.
Paint & Baseboards
Our contractor would have cost around $1,200 to paint the room, something I can do in my sleep, so we had always planned to do the painting ourselves. Before they left because of the shutdown, our contractors generously covered the newly installed tile floors so we could paint without worry.
We love Benjamin Moore’s Edgecomb Gray so much in our open-concept home because it changes colors with the fading light of day and provides a warm gray/beige that is heavenly. No question, we were going to do the bathroom in it.
Since we were planning to install board and batten on the bottom two-thirds of the wall, we set out to paint the upper third. We primed with two coats over the bare, newly installed dry wall, and then got down to painting. Two coats of Edgecomb Gray later and we were horrified!

The room turned from light and bright, to dark and gloomy. We had tested the color all over the freaking bathroom prior to construction and it was perfect. P-E-R-F-E-C-T! But, when it went up, it was so far away from perfect, I nearly cried.
In what was our last outing, we high-tailed it to the paint shop and purchased a color called Irish Mist. We only looked at it on the internet and knew this was playing with fire. But, desperate times called for desperate measures.
We got it home, cracked open the can, and fell in love.
A creamy gray/white, with strong hints of blue, made for a marriage made in heaven with our tiles. But, the proof would be in the pudding. So, we set about re-priming (hello, three coats!), repainting, but this time, we sized it up after each wall was painted. Wall one? In love. Wall two? Still googley-eyed. By wall four, we knew it was a keeper.
Along the way, we decided the board and batten was going to be too busy on the walls – we loved the color so much, we wanted to see more of it, not less. So, despite having a garage full of newly-purchased MDF, we abandoned the board and batten project on the spot. As we have often found with our renovations, game-time decisions are key and that was certainly the case here.

All that was left was to install baseboards and JohnR did a masterful job of it. We barely needed to caulk and fill the joints because of his careful measurements and cutting, even the scarf joint was disguised nearly perfectly. Whew.
Other Stuff
We had ordered a towel rack from a Finnish artist from Renovation Hardware (I think) that is more like a piece of art, but also provides some warm wood tones to cozy up the otherwise very cool stone and hardscapes. And, I ordered an oversized canvas print of a favorite photo I took in Ireland, which also helps to bring some warmth to the room.

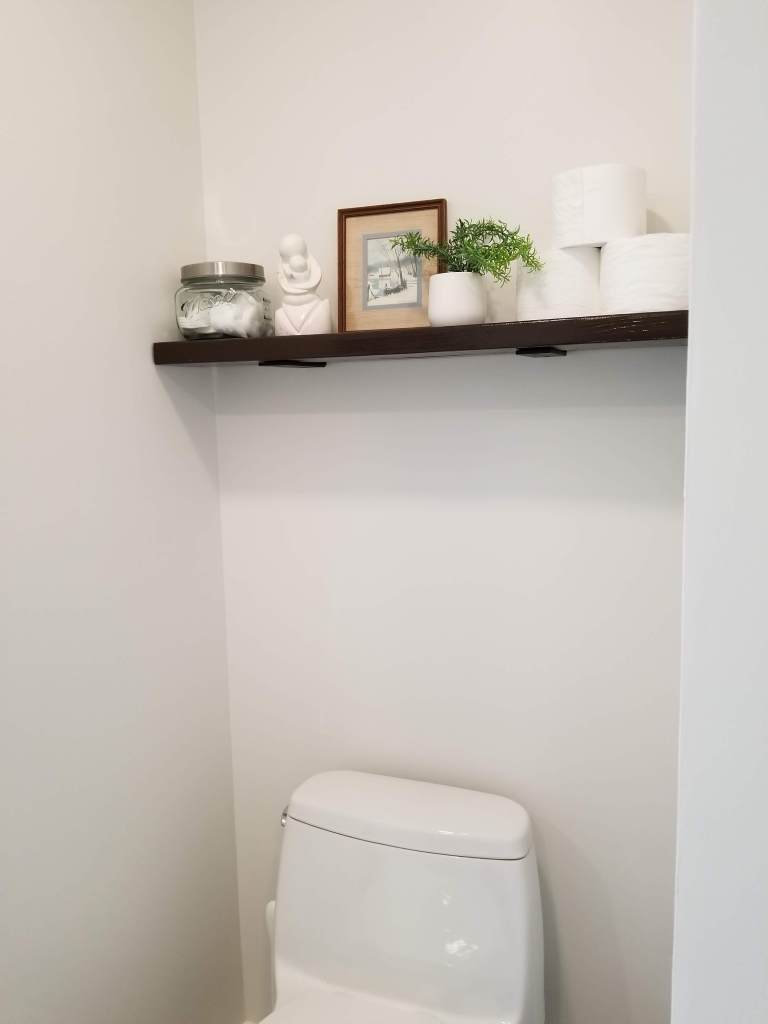
Finally, we took our ever-loving time to build an over-the-toilet shelf, less for added storage, and more to add a wood feature on an otherwise forgotten space.
Doors and Windows
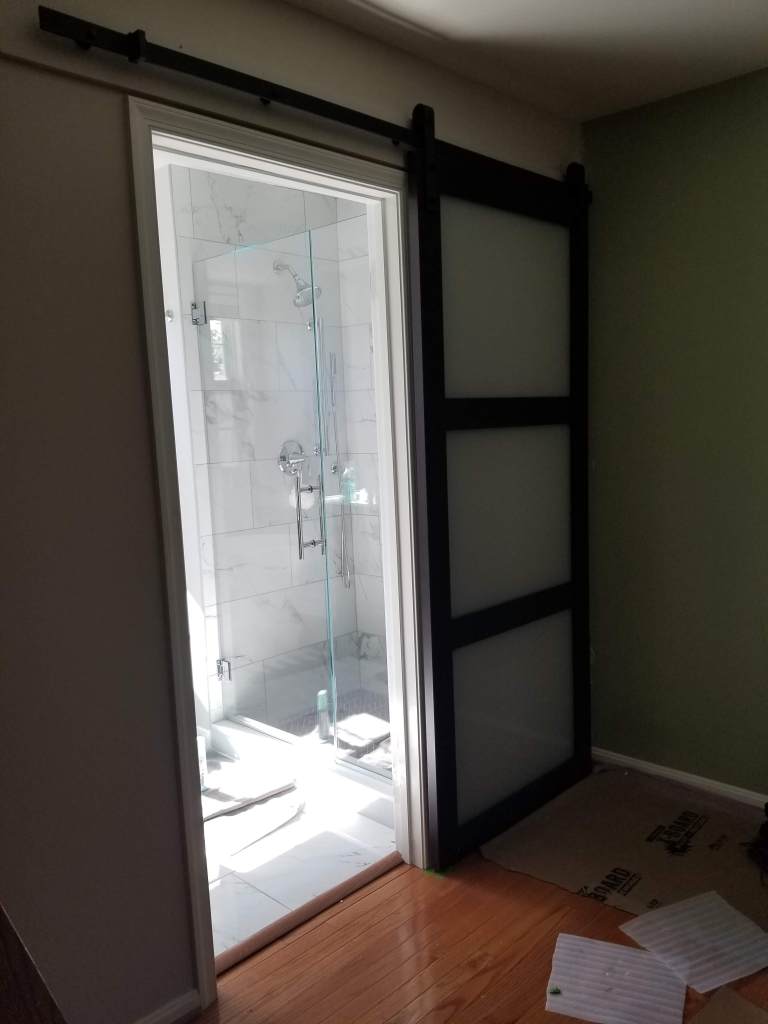
We are still looking for double café plantation shutters for the windows so that the top part can be kept open all the time, but the bottom would add some privacy. For now, we frosted the bottom panes to provide that privacy and it has the added benefit of matching the frosted glass in the barn door we installed.
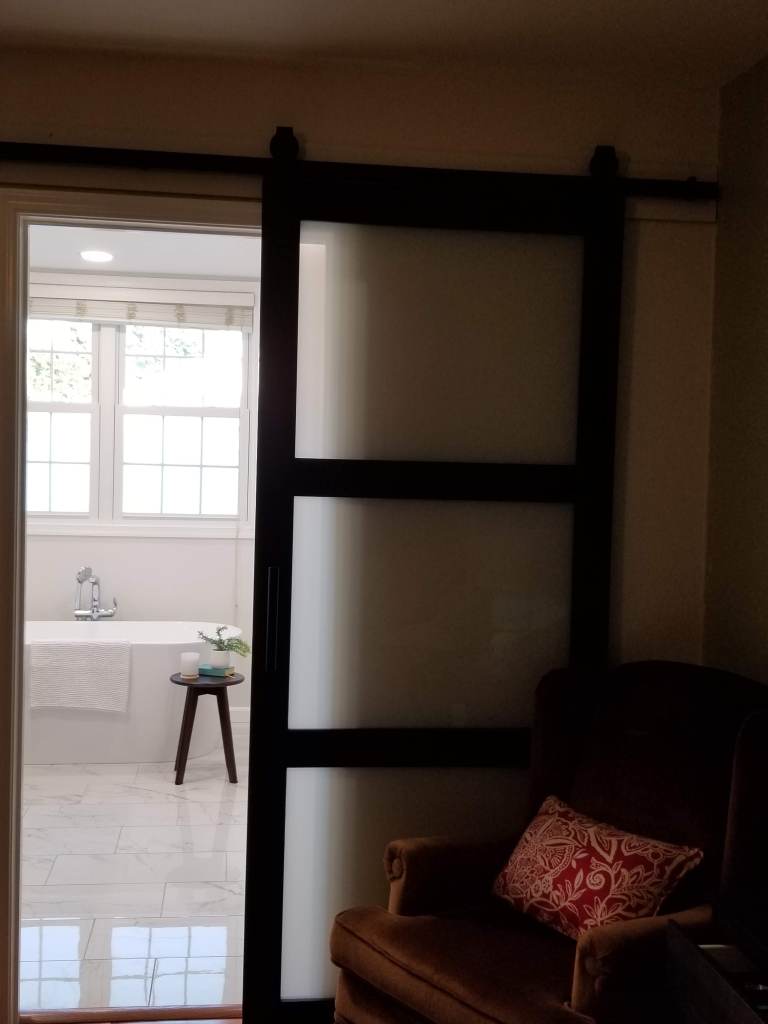
Speaking of the barn door, we had toyed with a pocket door, but after reading loads of reviews about how often they needed repair work, we decided on another option. Because the door to the bathroom would swing inward, and rest against the shower doors (NO!) we opted for a frosted glass barn door that we installed ourselves and slides on the bedroom side wall. More about that later, except to say, my husband is a pro with the level and while there was a steep learning curve to get this installed perfectly, he did it (with little help from me) and we really like how it keeps the bathroom from feeling closed in. Plus, because the bedroom is really dark, it lets all kinds of crazy light into the room from the double windows in the bathroom. Win-win.
The Master Bathroom Curse
Did you know there is an old wives’ superstition that when a master bathroom gets completed, the homeowner often sells the home? Has that happened here? Not yet, and not before I get a winter’s use out of that tub, but maybe come spring…we shall see.
We have always enjoyed the renovation process and this project was no exception. The quarantine made for rough sailing for quite a while, and those of you who follow my Facebook page know that to be extra safe, when the crew came back to finish, we ended up living in our basement for a week, communicating by texts, photos, and Alexa.
We couldn’t be happier with the end result and grateful to have such a good crew to work with. As it has been nearly a decade since we redid our kitchen, if that springtime move doesn’t come to pass, I’ve already alerted the contractor to be on standby 🙂