
A big kitchen update covering a lot of ground ahead. We can finally see the light at the end of the tunnel, but it is the size of a pin head. We think we should be much farther along, but we keep running into unexpected issues that were not on our bingo card.
We are not novices to DIY or home renovation, and we were really hands on with our contractor — I like to think in a not-very-annoying way, probably because we sorta/kinda understand the complexity of some of our requests and we really appreciate our contractor allowing us to do some of the reno ourselves to reduce our costs. In doing the budget, now over a year ago, and talking with our contractor about what itemized projects within the kitchen reno would cost if we had his crew do them, we estimate, overall, by doing some of the stuff ourselves, we have saved somewhere in the neighborhood of $20,000. Not chump change, for sure, but if you count time as money, that savings goes way down, of course. Still, in a large kitchen reno, one that tripled the footprint, we were able to apply those savings to premium appliances and custom tile and trim work.
First, the good stuff:
After a week of meticulous measuring and hole-drilling trepidation, THE CABINET HARDWARE IS FINALLY INSTALLED and it is straight as an arrow. Of all the things, these old-soul beauties have to be our favorite, even if the installation of 23 handles took years off our lives. It was one of those jobs we just had to do ourselves and, although it took forever-and-a-day, totally worth it to have it done and dusted perfectly.

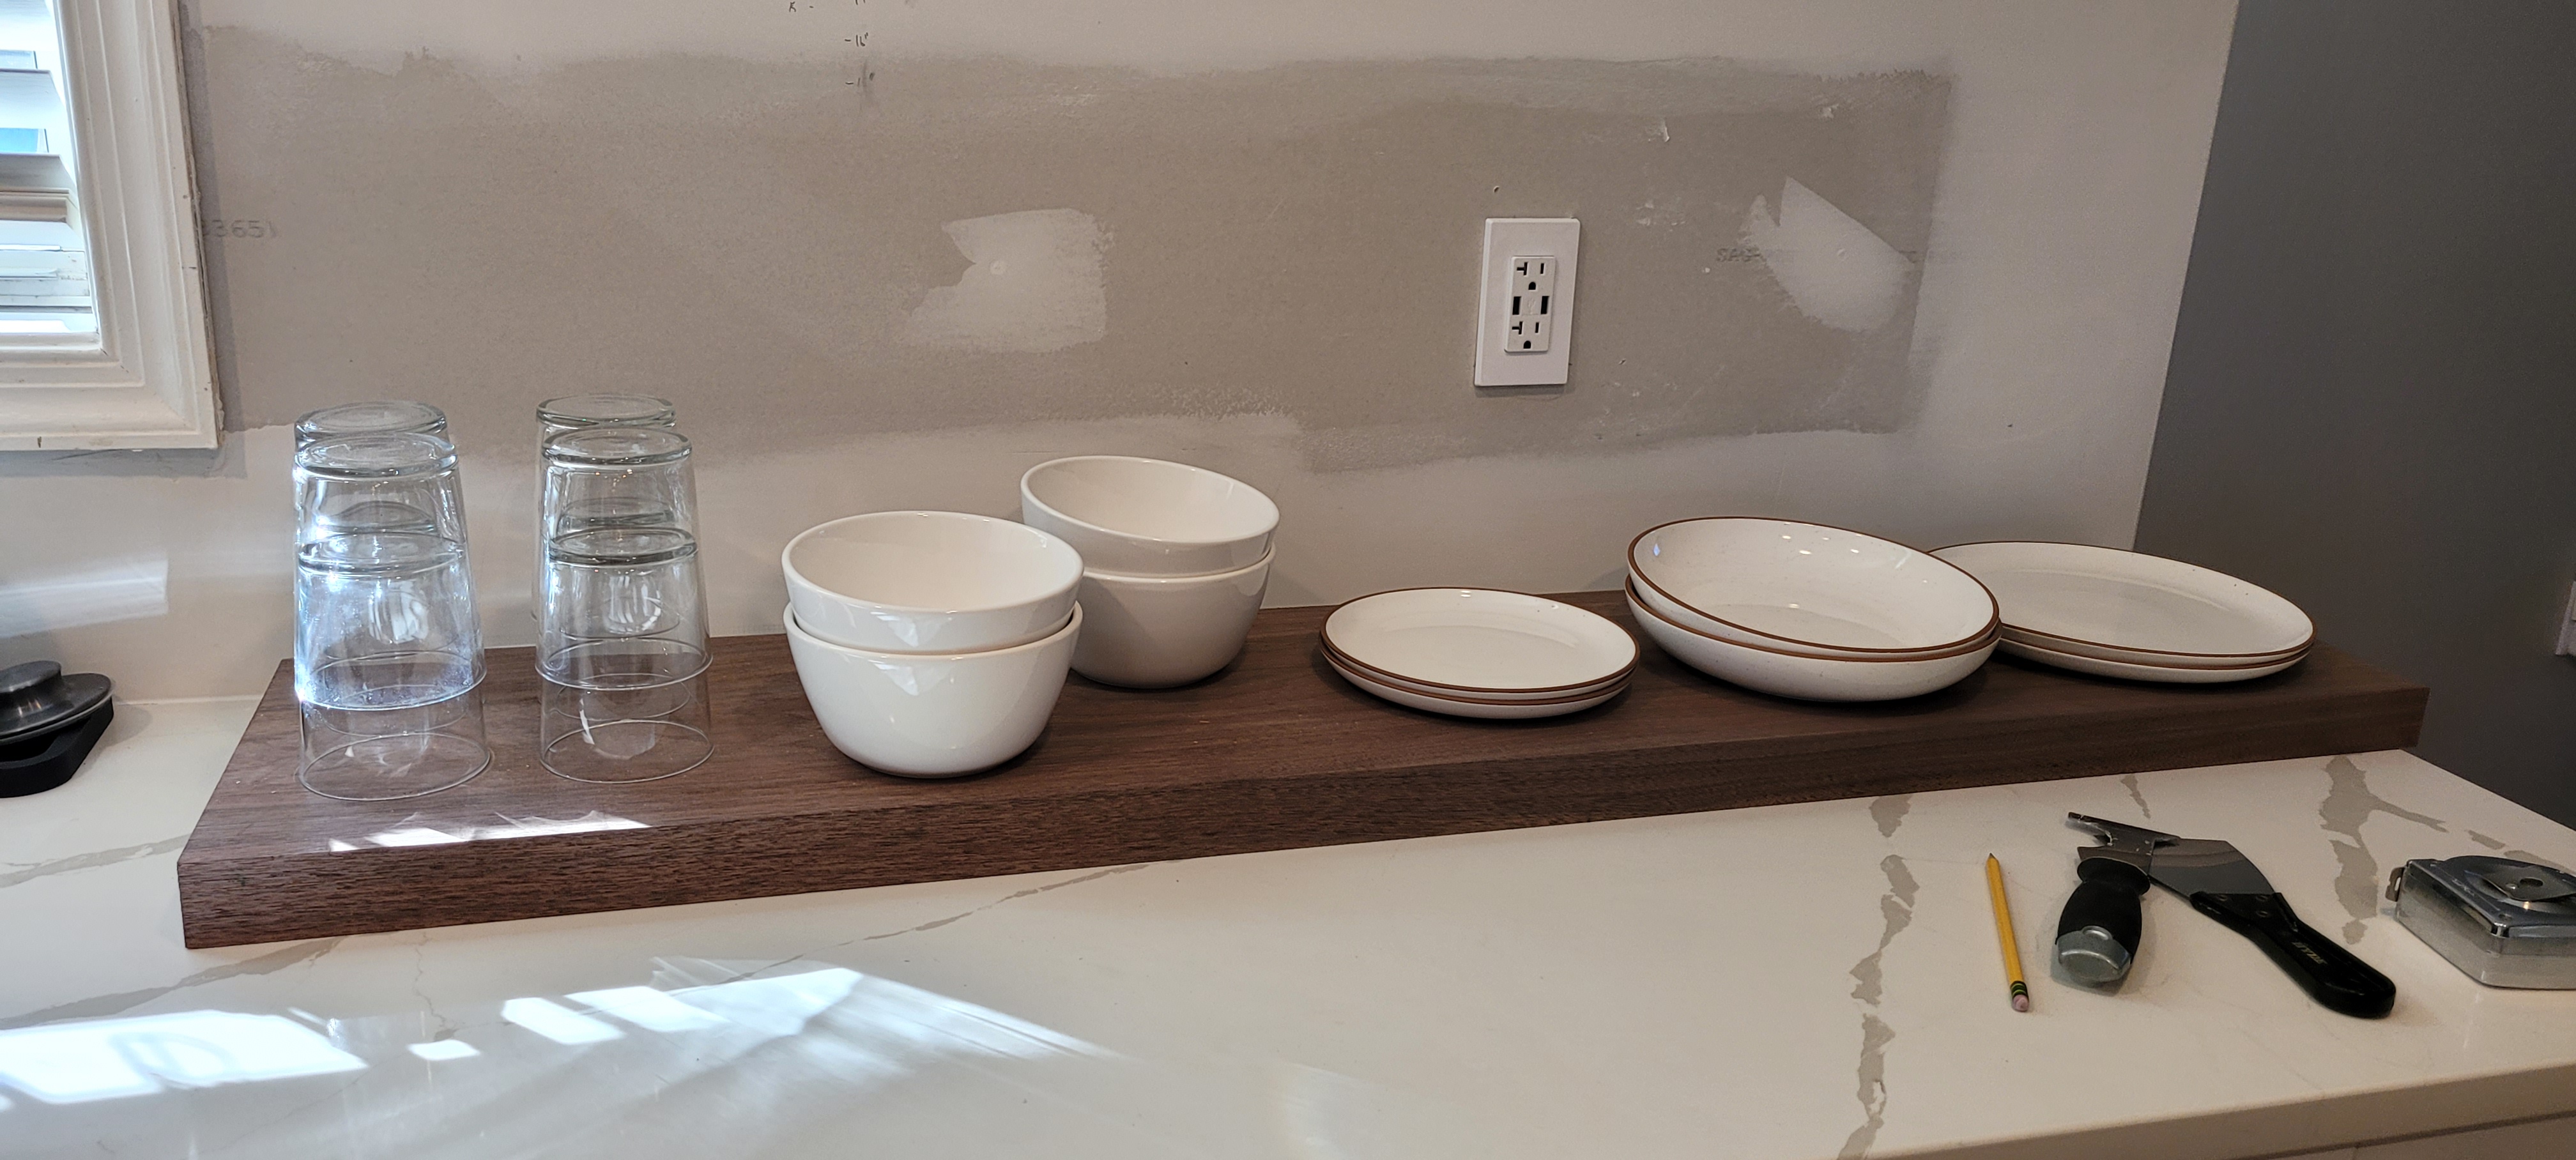
We are also making progress on installing the support posts for the floating shelves. It is a p-r-o-c-e-s-s, lemme tell ya. There is fancy-schmancy company out there that does a whole floating shelf system we had our eye on — until the price tag came to well over $600 A SHELF, which just wasn’t in the budget.

Instead, we opted to purchase these highly reviewed floating shelf posts, each having a weight capacity of 100 pounds (we’ll be installing four on each long shelf). The walnut wood is heavier than you might imagine and we are keen to over-support rather than under-support since they will be loaded down with dishes, glasses, and other kitchen bits.
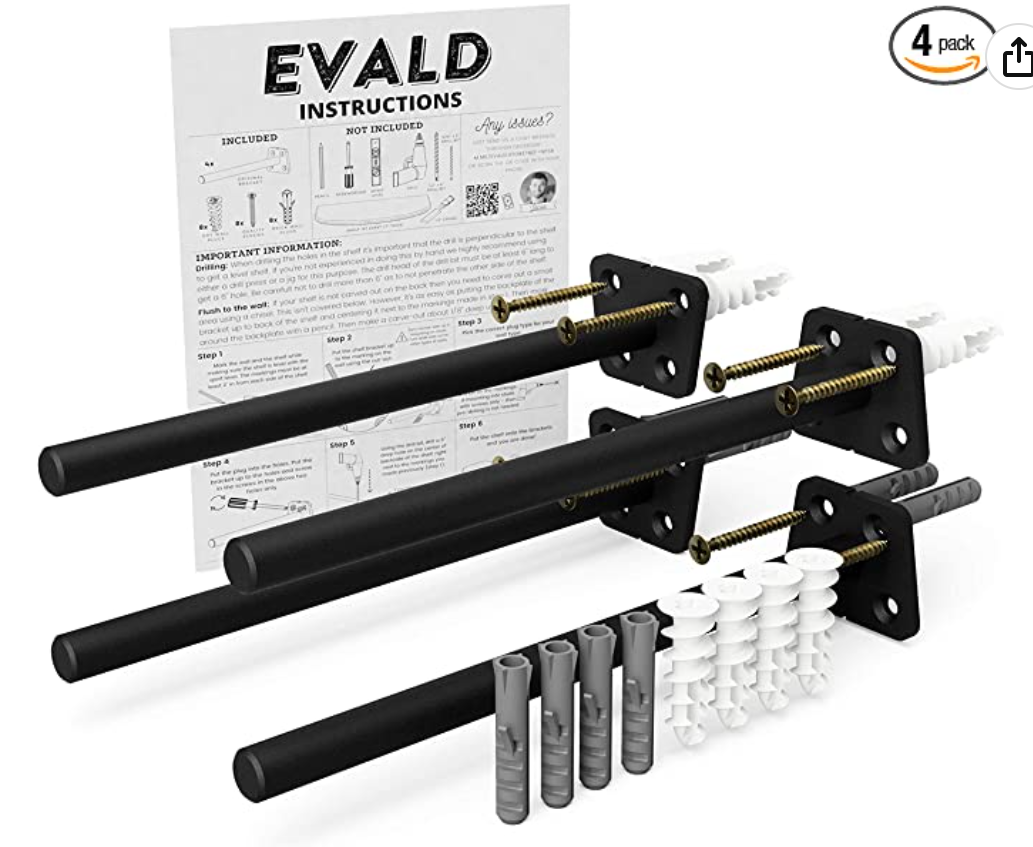
The downside to these posts is that they must be installed individually (rather than being welded onto one long bar like the expensive kind is.) These are about $32 apiece, and so, in the end, if you count the wood we fetched from a mill in Pennsylvania, each shelf will run about $130 each (versus the aforementioned $600/ea), so once again, our labor is where the money saving comes in.
Having crowed about the money savings, the fact is, we still have to install the dang things. And they need to be dead-on level. And we are drilling into studs. All of it is hive-inducing, but when we opened the wall up to get at the electrical many moons ago, one of us had the foresight to lay a piece of cardboard over the opening and trace a template of every single stud. That would be my contribution to the project, I’ll have you know. I’m nothing if not a fore-thinker 🙂

After the posts are installed on the wall, we still have to drill holes in the back of our swanky new wood, another terrifying process, but thankfully, the mill gave us a few scrap pieces on which to practice before we do it for realz!
The Bad
Not everything is perfect on this project. As I said, we keep running into work-arounds, some expected, some surprises, and some downright confounding.
At the end of our wet wall, there is a two-foot “bump-out” that simply needed painting. A simple job I could knock out in an hour. Unfortunately, I was so busy looking down at the sparkly new handles on the cabinets that I forgot to look up at the damage to the wall when the cabinets were ripped out. Chipped old paint needed to be scraped. And once we started that, we realized the former homeowner or the original builder must have built up a crooked wall with plaster and that, too, has dinner-plate sized chips in it. WAY too much to sand out. Nope, in order to have a nice smooth wall, we would need to patch and repair, sand, sand again, sand a third time, and then start a skim coat. I’ve always said dry wall workers are the artists of the construction world. Even our contractor hires out a pro to get a perfect look. Tapering in mud is a skillset neither of us have, that’s for sure.

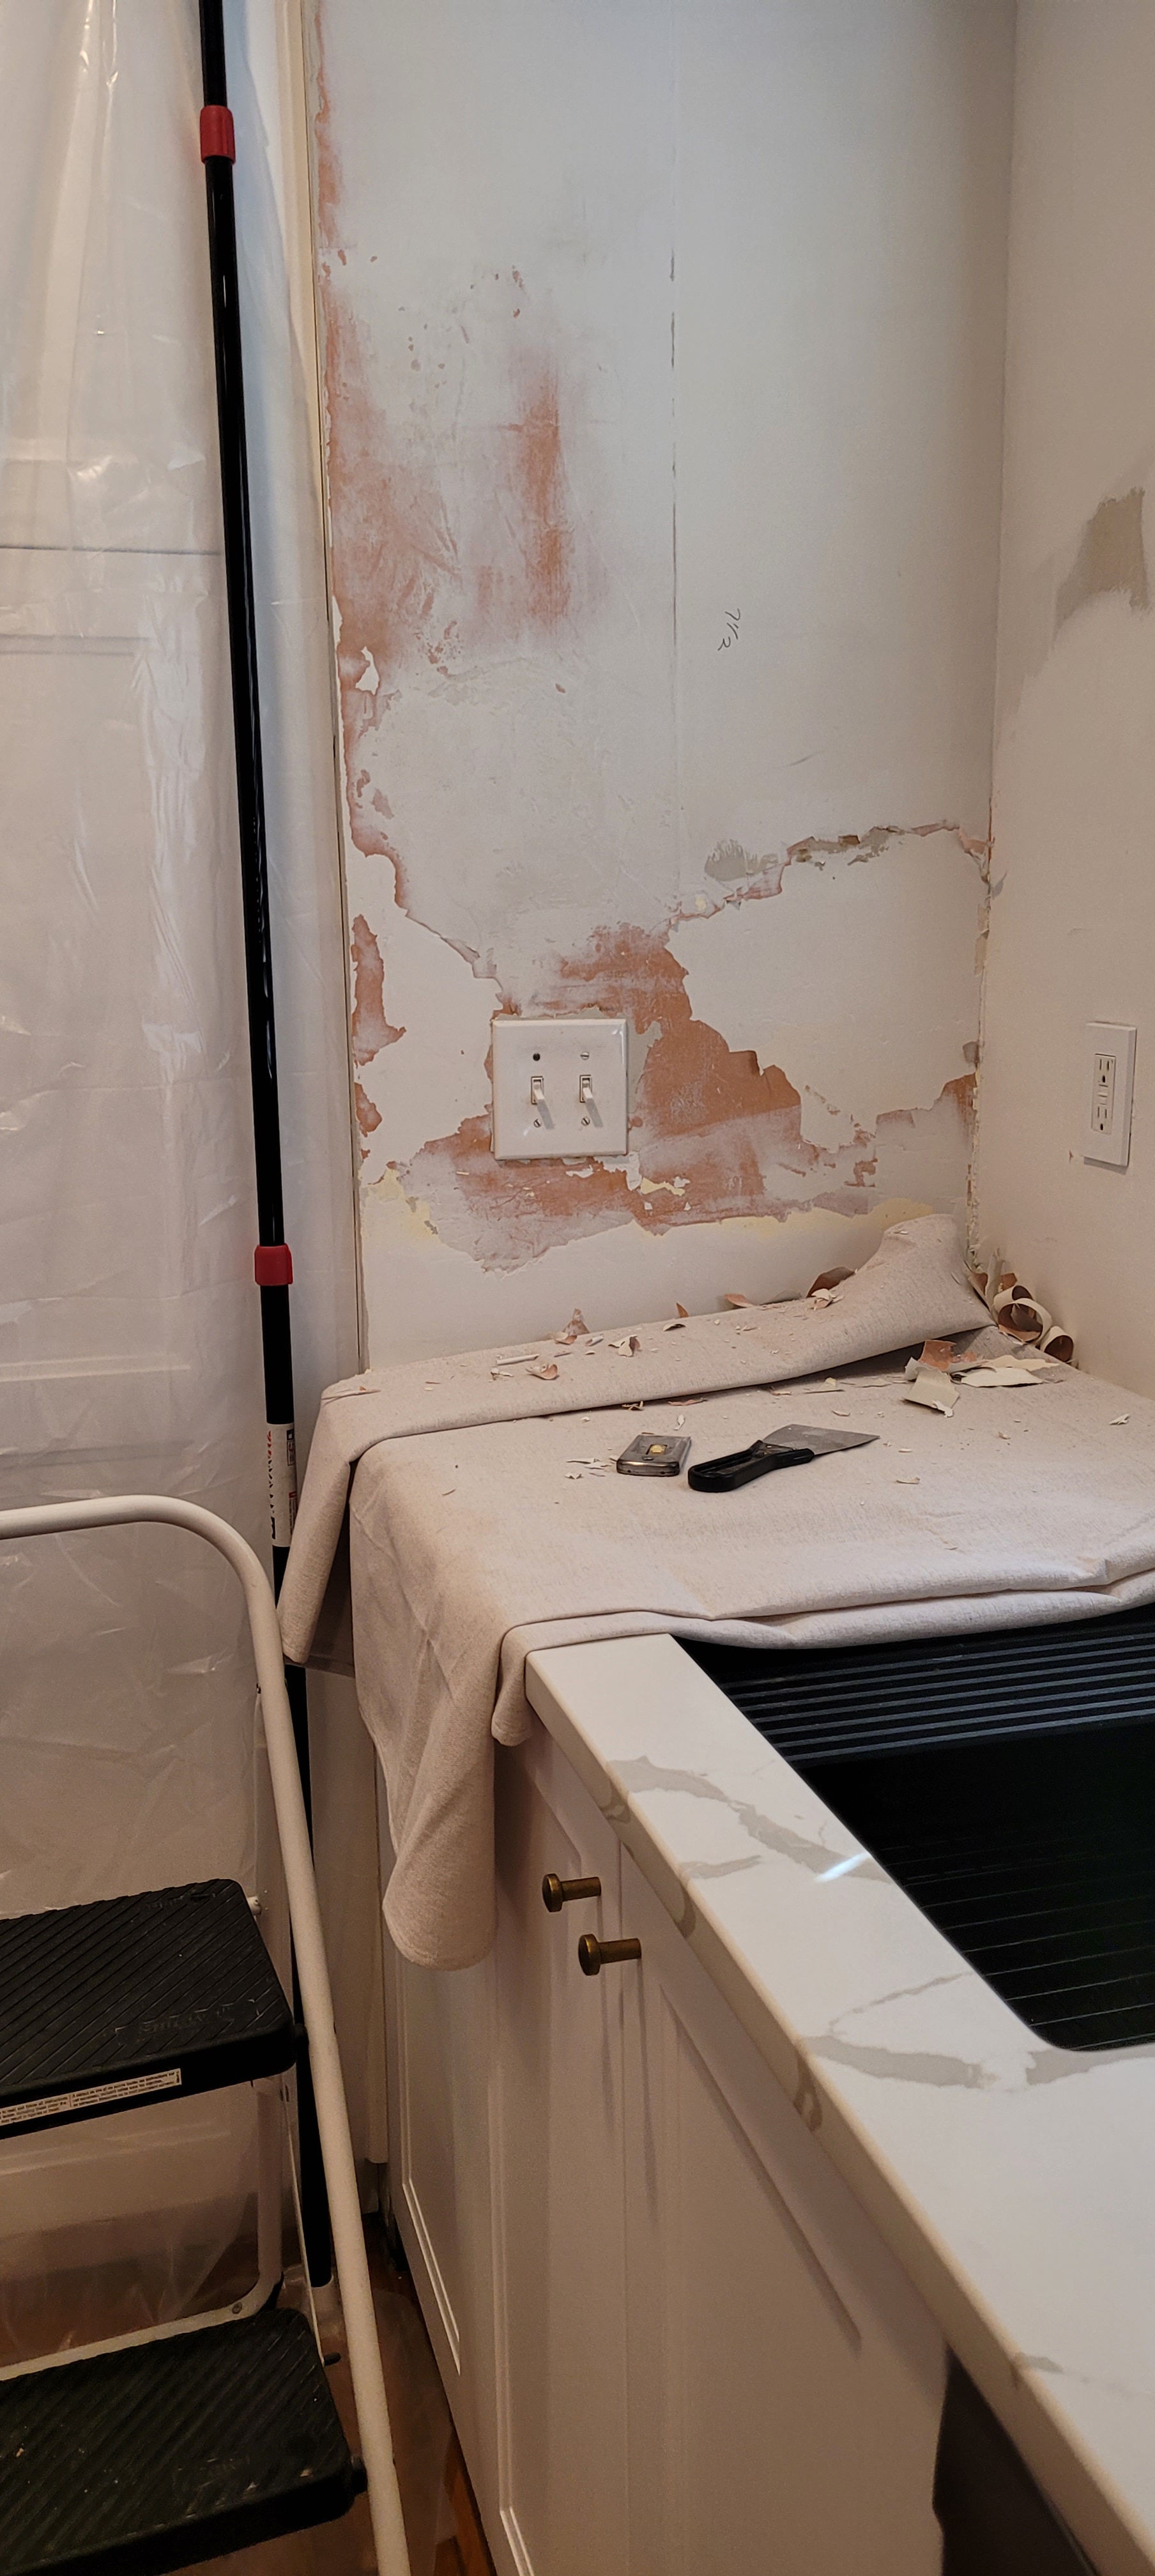
But, we already spent over $1,000 having a ceiling repaired and painted — money unbudgeted for, but well spent. So, hiring someone to do this one small, but very central, wall was just out of the question. Thankfully, we have a solution — stay tuned for a future update 🙂
Another issue that popped up — choosing our base trim. We simply could not find the cabinet bead trim piece for the baseboards we had our hearts set on, so we scrapped the whole plan and reconsidered. Because the base trim in the entire house is going to be changed, little by little, and because we want to make sure we can get whatever we choose well into the future when we get around to changing the rest of the house, we need to build trim from pieces that are readily available and fairly simple and clean-looking.
Because we had planned to do board and batten in our master bath during the 2020 renovation, but scrapped those plans at the last flipping moment, I had insisted we could use all that trim at some point, for something down the line. Welp, that something is going to be our new base trim 🙂 We’ll be doing a 5″ x 1″ with a quarter round topper. Simple, but impactful at about 6″ high. Following the rule of thumb that base trim should be roughly 7% of the height of a room ceiling, or in our case, roughly 7 inches, we are pretty darn close.
Depending on how much gapping we have between the new floor and the base, we will likely also add a shor moulding at the floor level, so lots of visual impact. We had to purchase another batch of quarter round, which brings total bill for doing all the base trim in the new kitchen, hallway, and the entire 11.5 ft x 8.5 ft island will be roughly $75. Not bad, I tell you. Not bad at all.
The Utterly Intolerable
I’m not into zodiac woo-woo, but I am a libra, and whatever the woo-woo sites tell you about each zodiac sign, one thing is certain — libras need balance in scale, texture, and symmetry. How this happened on our pantry/fridge wall is beyond me (see the purple line to pinpoint the exact spots my head explodes…)
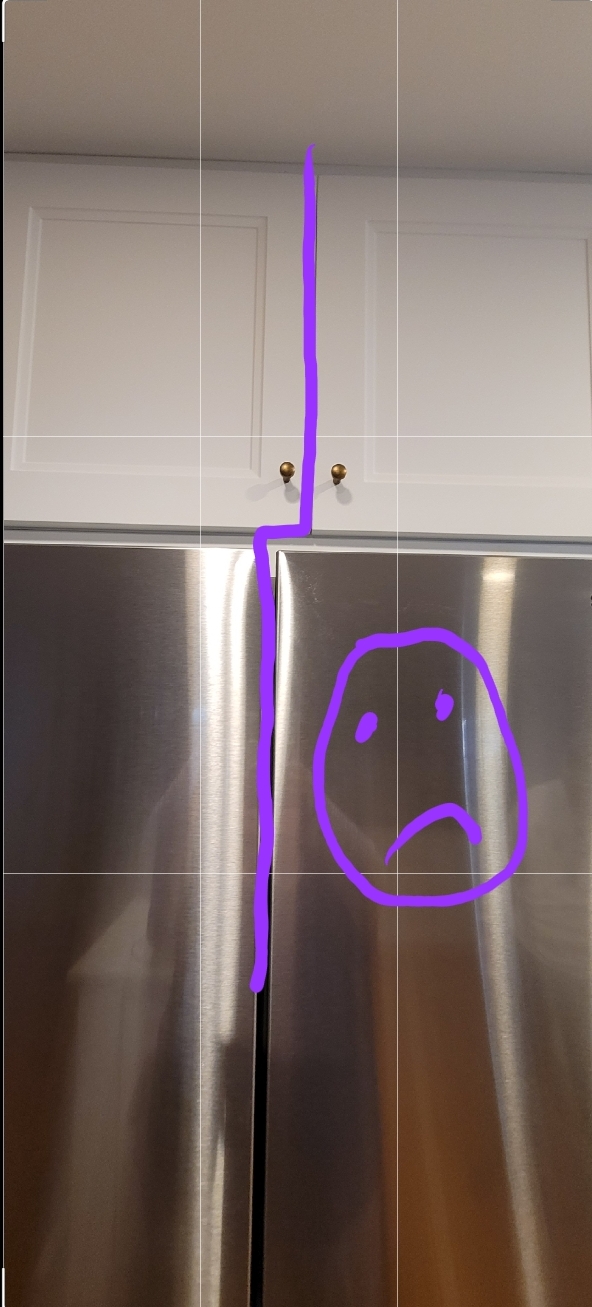
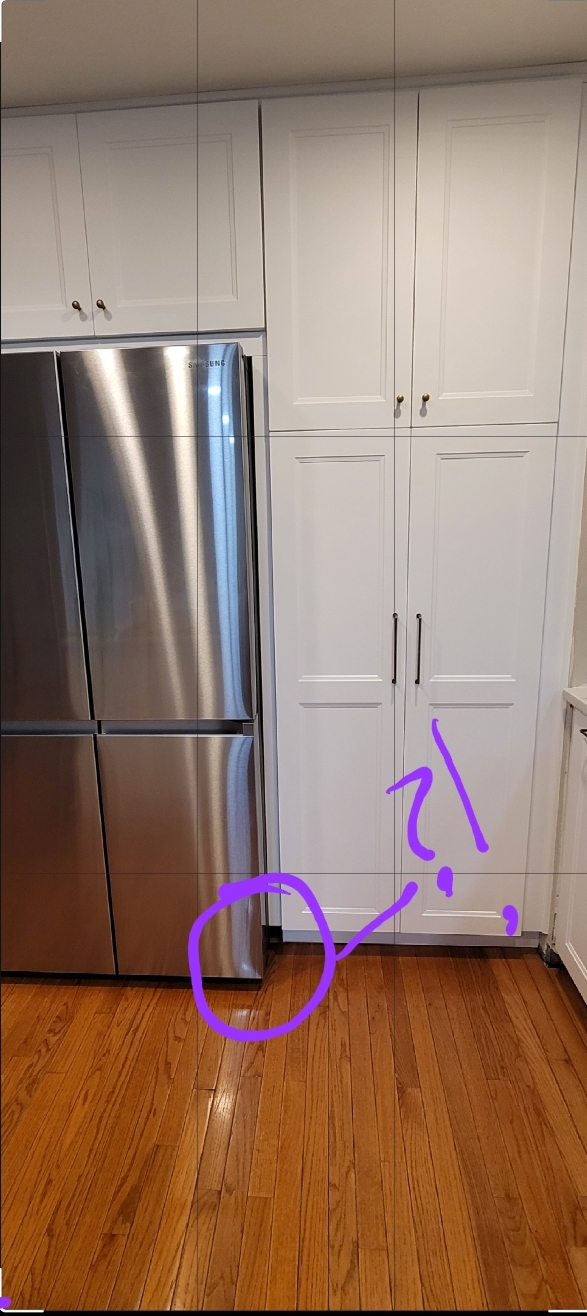
I can only say that our old-school contractor was probably not a libra.
More bewildering, we were on site every. single. day. We missed it and we missed the trim at the bottom not hitting the ground. This was an easy install and we could have done it ourselves (and, in retrospect, should have.) I think the lessons we are learning is that when it comes to the meticulous stuff (okay, picky stuff), those are the jobs we should just opt to handle ourselves – even if it takes weeks longer than a pro could do it.
Unfortunately, we will have to rip out ALL of the trim, rehang the cabinets on that side to re-install properly. It will be one of the last things on the punch list and something neither of us is looking forward to.
As we barrel toward the finish line, the main tasks remaining are installing the floating shelves, finishing out the tile work, installing the baseboards, installing all new electrical outlets, and doing all the box trim on the island. We also have to finish the utility cabinets on the other side of the room which will involve assembling, trimming, priming, and painting. Fun times ahead, but our patience has worn thin and we are focused on getting this done by the one year mark (in just three weeks.)
The pin prick of light at the end of the tunnel is taunting us.
