
With apologies to Frank, we thought the lyrics to “My Way” sum up perfectly the frustrating situation in which we currently find ourselves in this kitchen renovation. Forgive the alteration…
Regrets, we’ve had a few (and some mistakes, too)
But then again, too few to mention (oh, I think this multi-worded blog post would beg to differ)
We did what we had to do (or paid someone else — looking at you ceiling paint)
And saw it through without exemption
We planned each charted course (sometimes)
Each careful step along the byway
And more, much more than this
We did it (sort of) our way
Yes, there were times, I’m sure you knew
When we bit off more than we could chew (hello floor removal)
But through it all, when there was doubt
We ate it up and spit it out (or wept ourselves silly)
We faced it all and we stood tall (and also curled in a ball)
And did it our way
In case this sounds like the big reveal of our brand spanking new kitchen, keep your powder dry because we have miles to go before we put this thing to bed.
We are in a brain freeze/holding pattern/pulling-hair-out/counter-head-bang conundrum with these d-a-m-n floating shelves. More on that later — maybe the hivemind out there can come up with some suggestions for how we might solve this debacle because we are fearful all that pretty tile may be a thing of the past if we do not figure this out.
For now, though, it might be fun (ha!) to revisit some of the regrets we have — we always have an “I wish we woulda done this” list and this project is no exception.
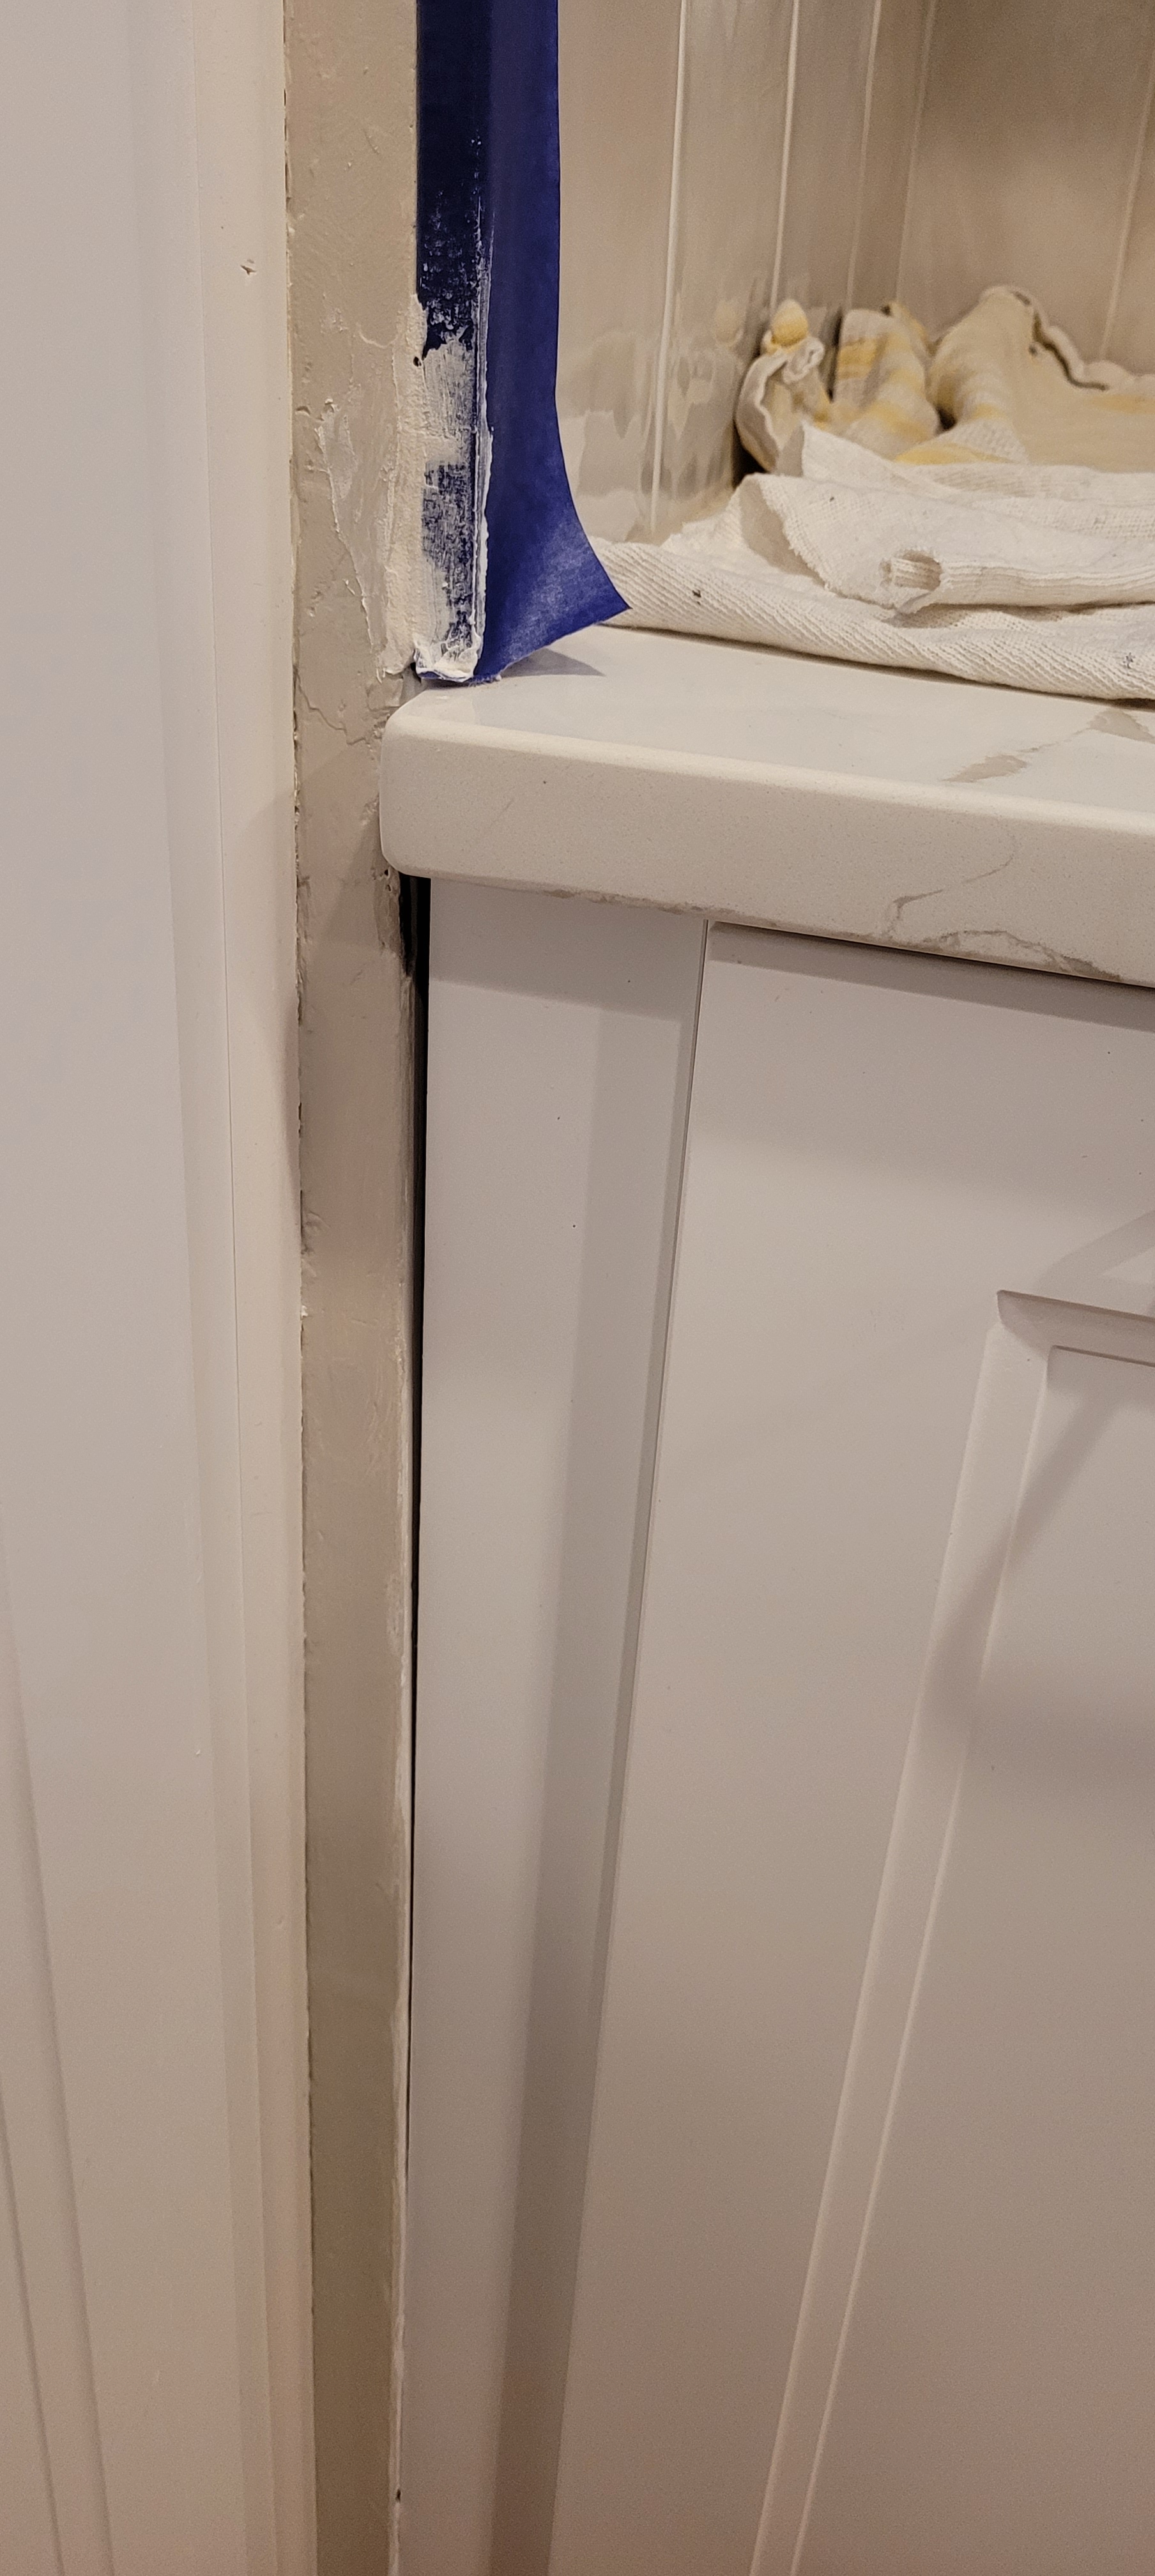
- When we had the tile installed, there were gaps between the tile and the wall on the visible side of the Schluter edge. We thought the tile guy would have taken care of it, but the tile guy said that was the paint guy’s job. Little did he know, we were the paint guy! So, while we wait for our brain cells to kick into high shelf-installing gear, I’m in caulking mode. Below the countertop will go some scribe for those big gaps, but the rest has to be caulked. So much caulking.
2) The range hood. We wished we would have hung our fancy-schmancy range hood ourselves. Granted, it is an unusual piece of equipment that came all the way from Italy (those wacky Italians) and the reason we love it is because it looks like an art installation. We needed a range hood — venting to the outside presented a sturdy challenge, permits, and an HOA approval.
A ceiling vent was our first choice, but the rafters and support beams in the ceiling meant framing it in just the right place would be difficult and chancy. When we saw this Futuro Futuro (it’s so nice, they named it twice!) we fell in love with the unique look and were sold when we learned the filter needed changed once every five year (five years!) and pendant lighting, to boot.
Anyway, upon installation the contractor got lost in all the cables and cords that make up the art installation part of the thing, criss-crossing cables, marring our brand-new ceiling and hanging the damn thing an inch off center. We will be fixing it ourselves, but we ain’t happy about it.

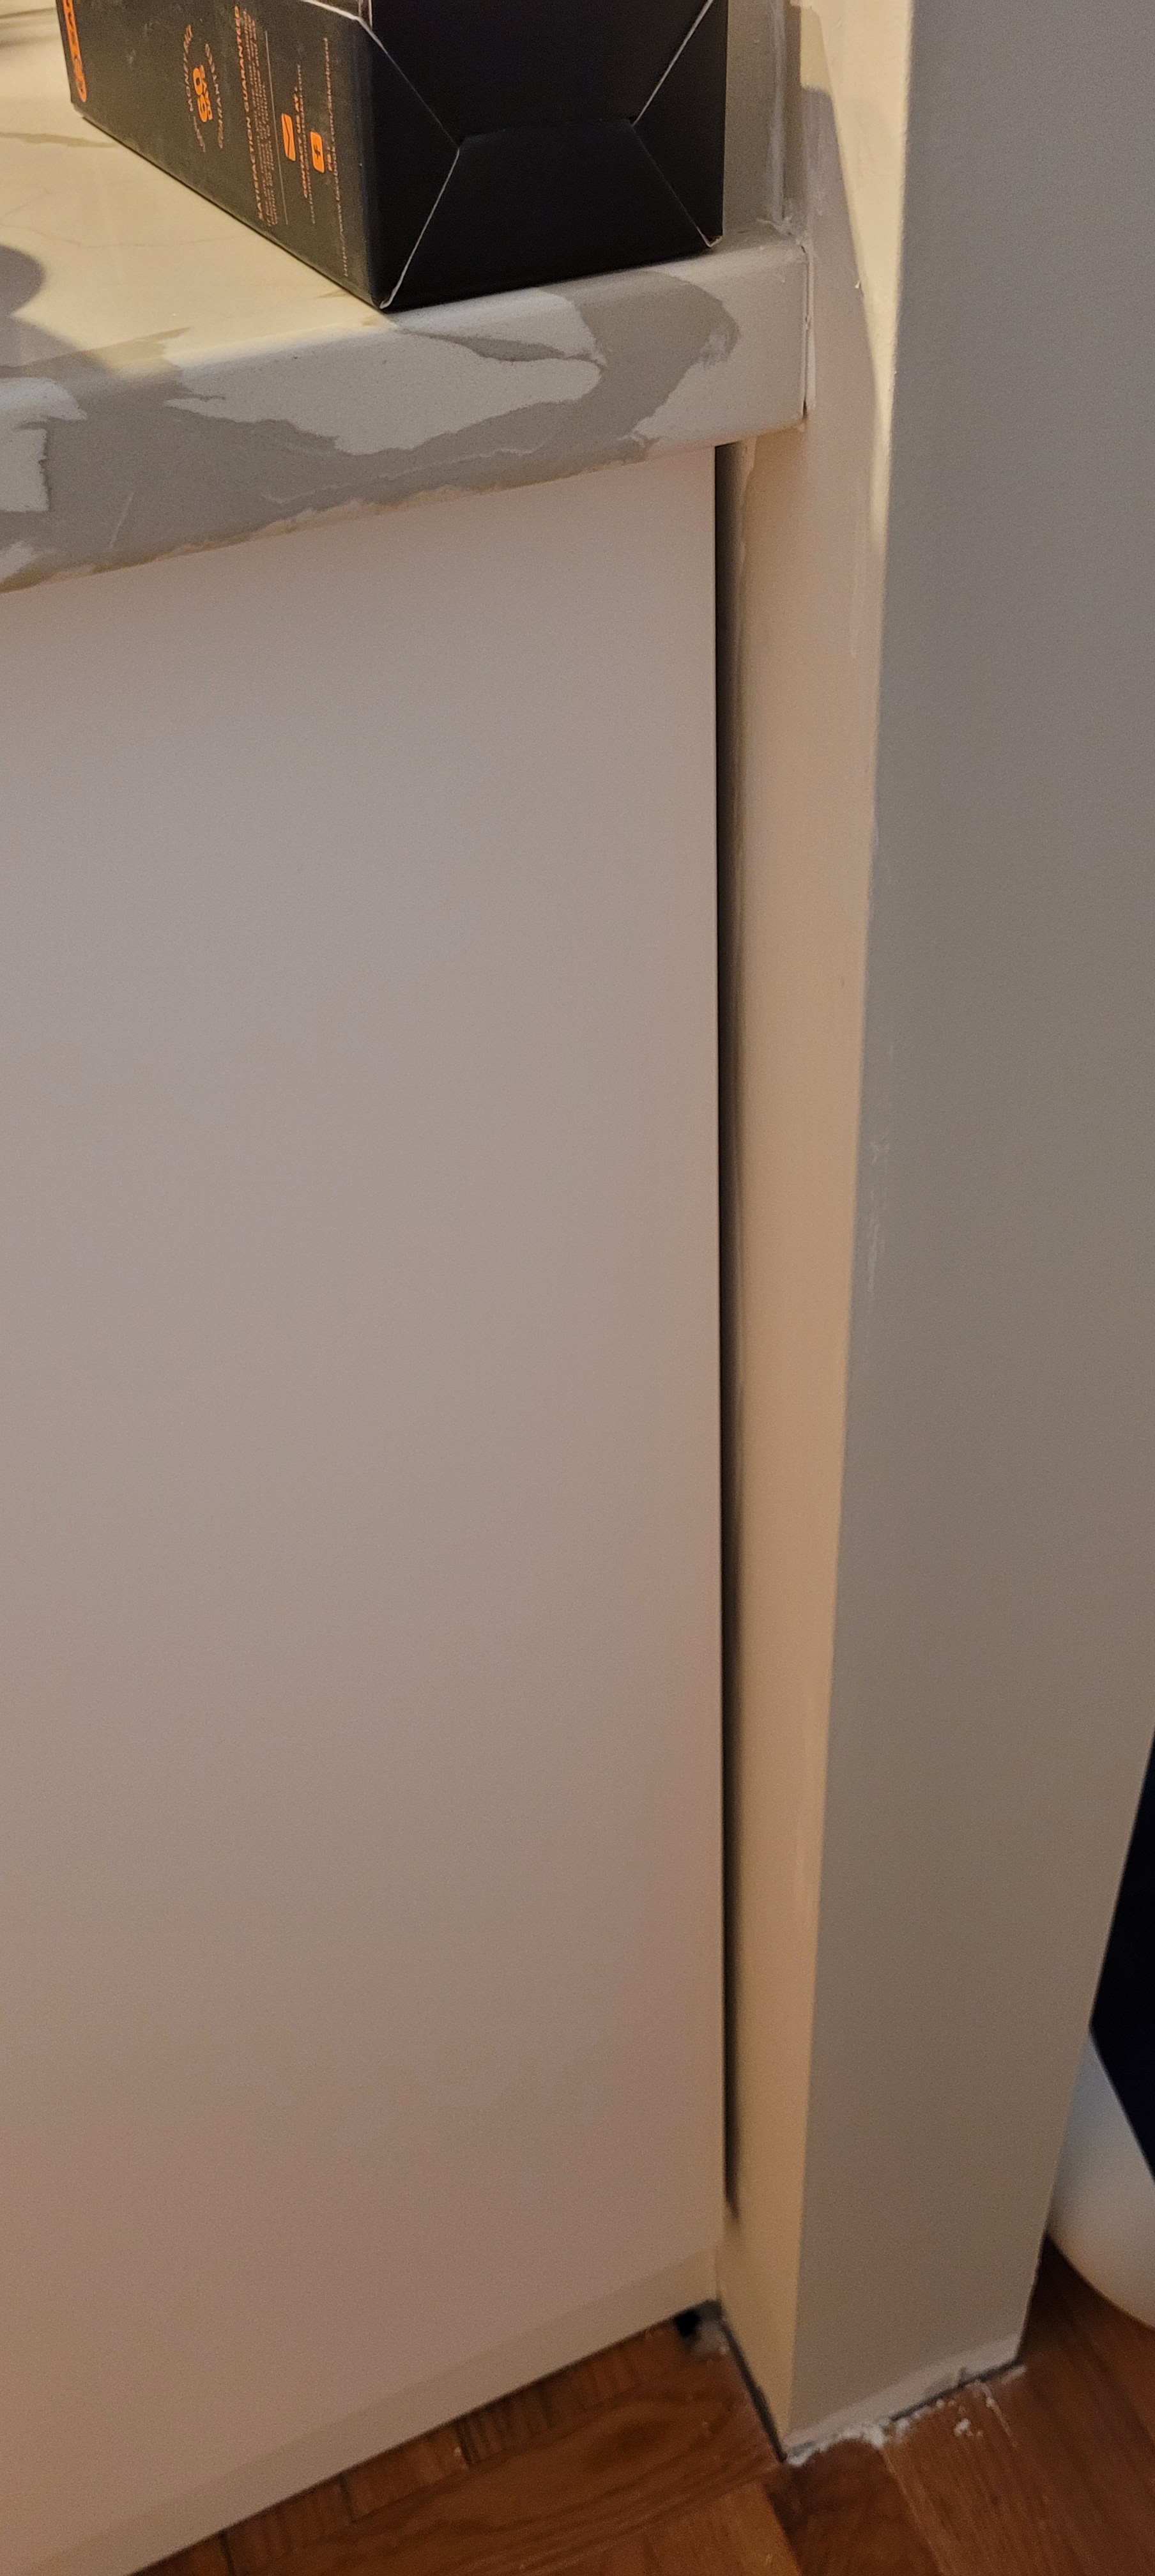
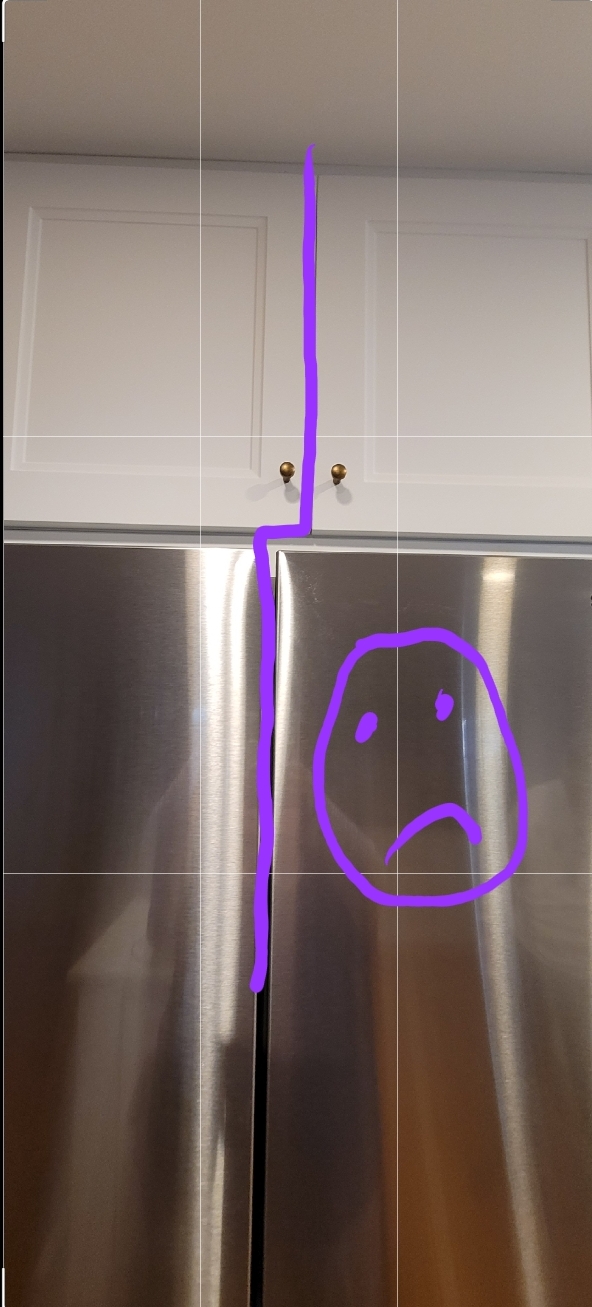
3) The pantry wall. We were on site every single day. If you have been through a renovation with a contractor, you know the questions come at you fast and furious. And what you get when you think things are obvious and need no explanation (the fridge center seam should align with the upper cabinet seam!) is this:

Yes, we will be taking out the pantry wall cabinets for repositioning and redoing the trim, but we aren’t happy about that, either.
Could we go back to the contractor for a redo? Yes, but it is complicated by the fact that the same people will be doing the re-work and they thought this looked just fine.
Let me say, we have worked with this contractor before, several times, and would do so again, in a heartbeat. They got way more right than wrong. The important bits are done correctly and to code (plumbing and electrical). It is just the aesthetics that graced the wrong side of the goal-posts and we knew better than to leave that part up to someone else.
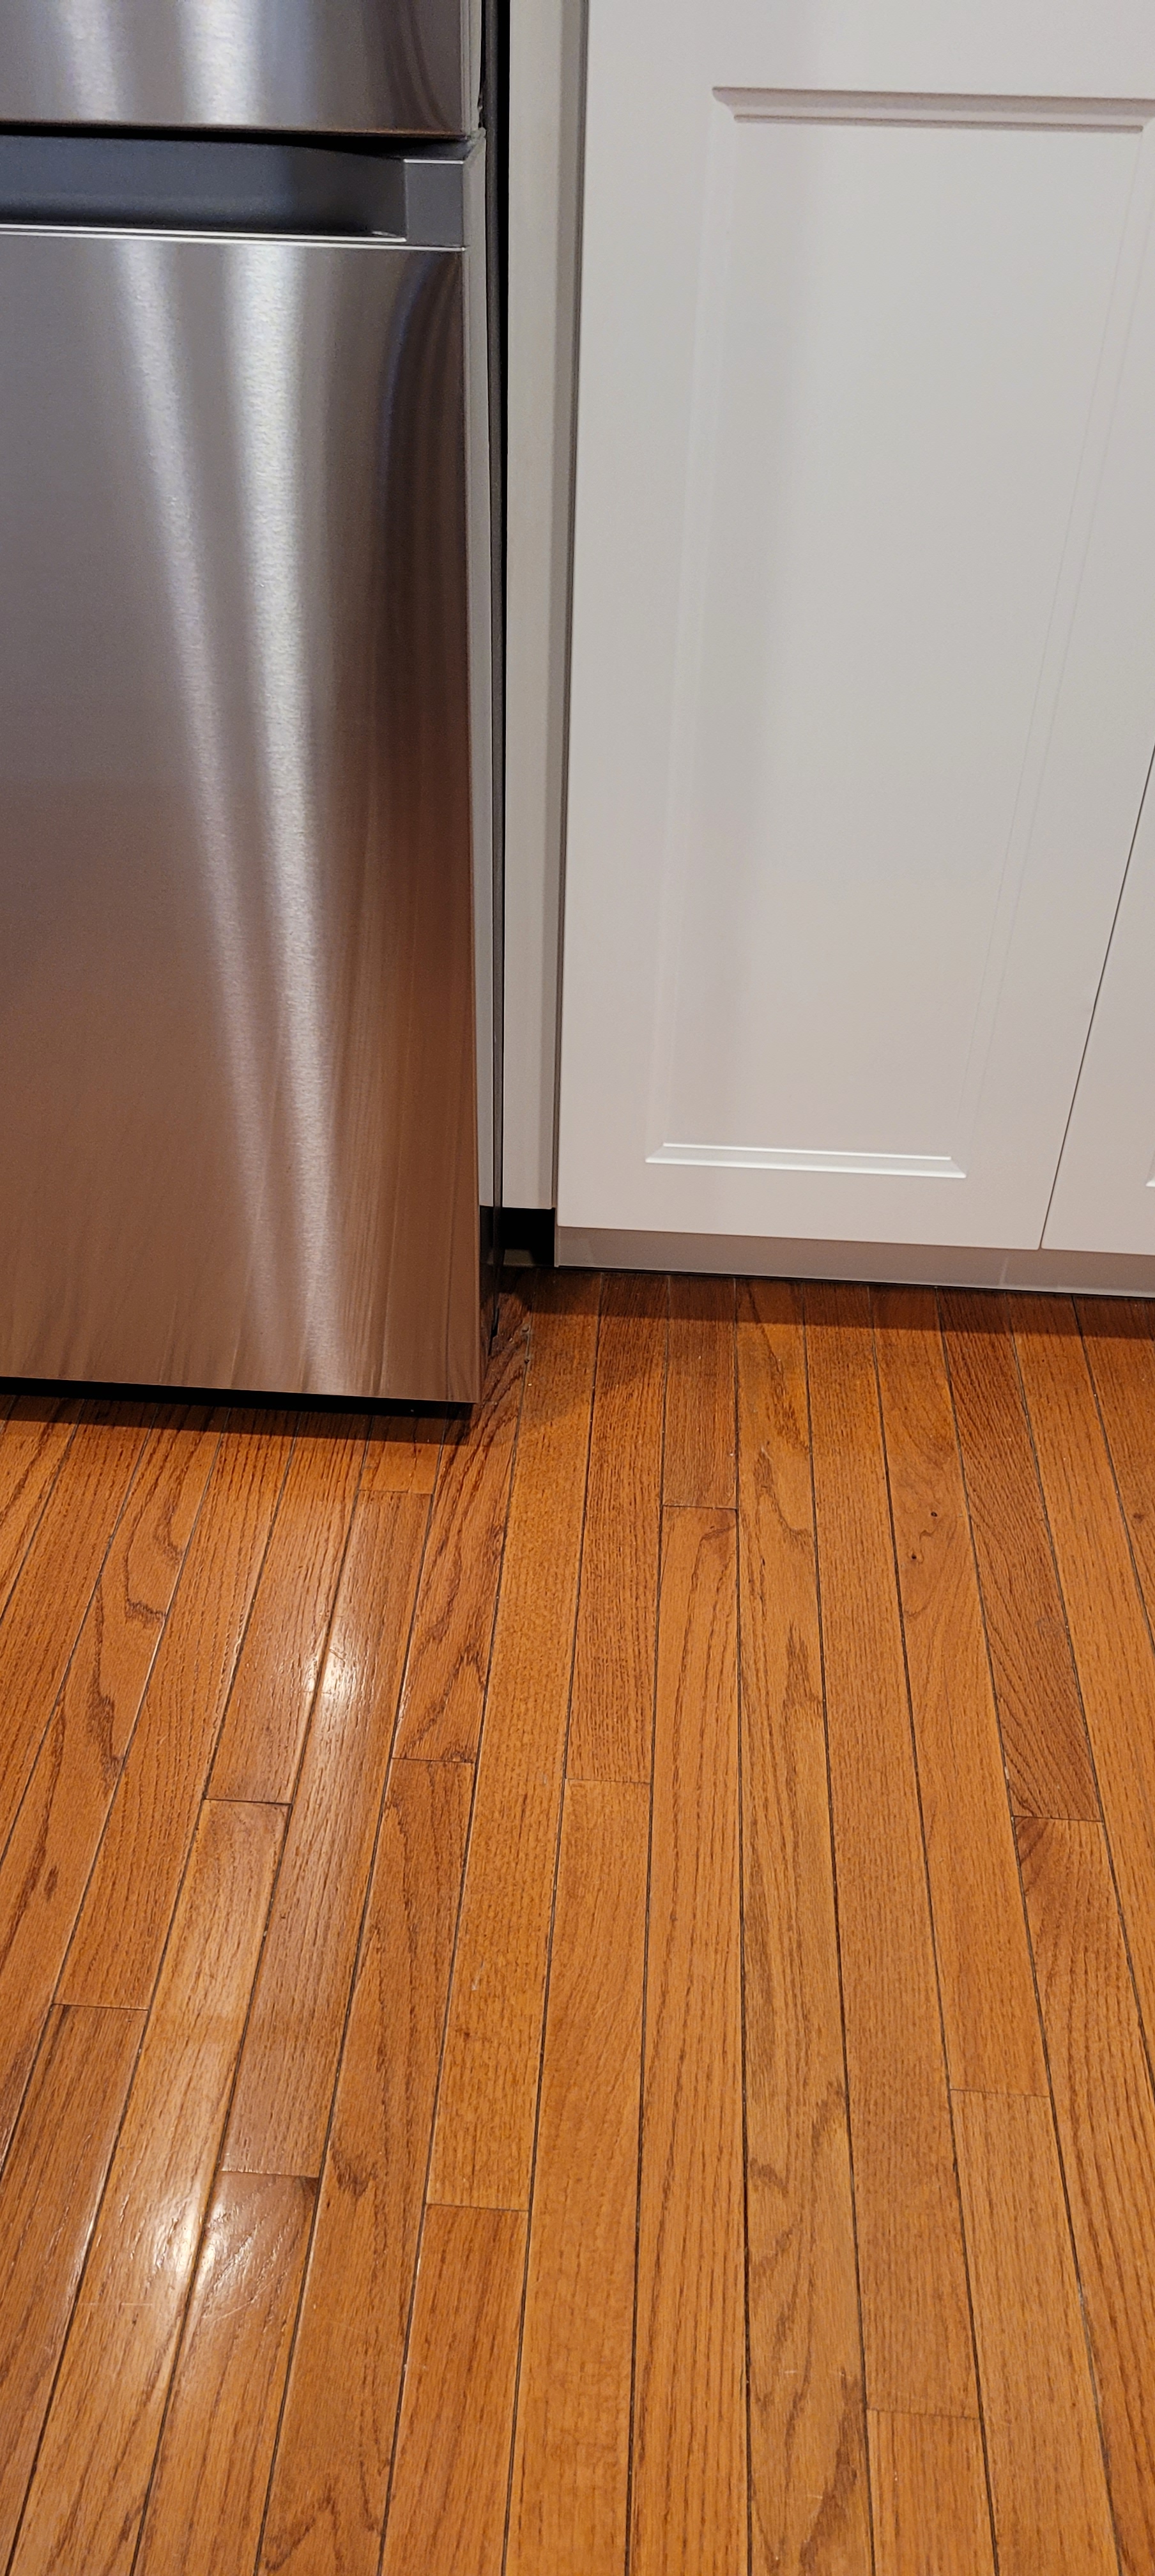
4) The floor. This one is all on us. We had to go back 28 years to get the original model name/number for our current flooring. Would we have liked to have changed the oak floors to something else? Yes, but with an open-concept main floor and the same hardwoods throughout all three levels, that was a big budget NOPE. We needed to replace the hardwoods we removed from the dining room with the same make/model in the new kitchen since we would be marrying the two floors together.
Thus began the detective dance. We finally found Bruce Oak hardwoods in Butterscotch (weirdly not ‘Gunstock’ as most of the other homes in our neighborhood used.)
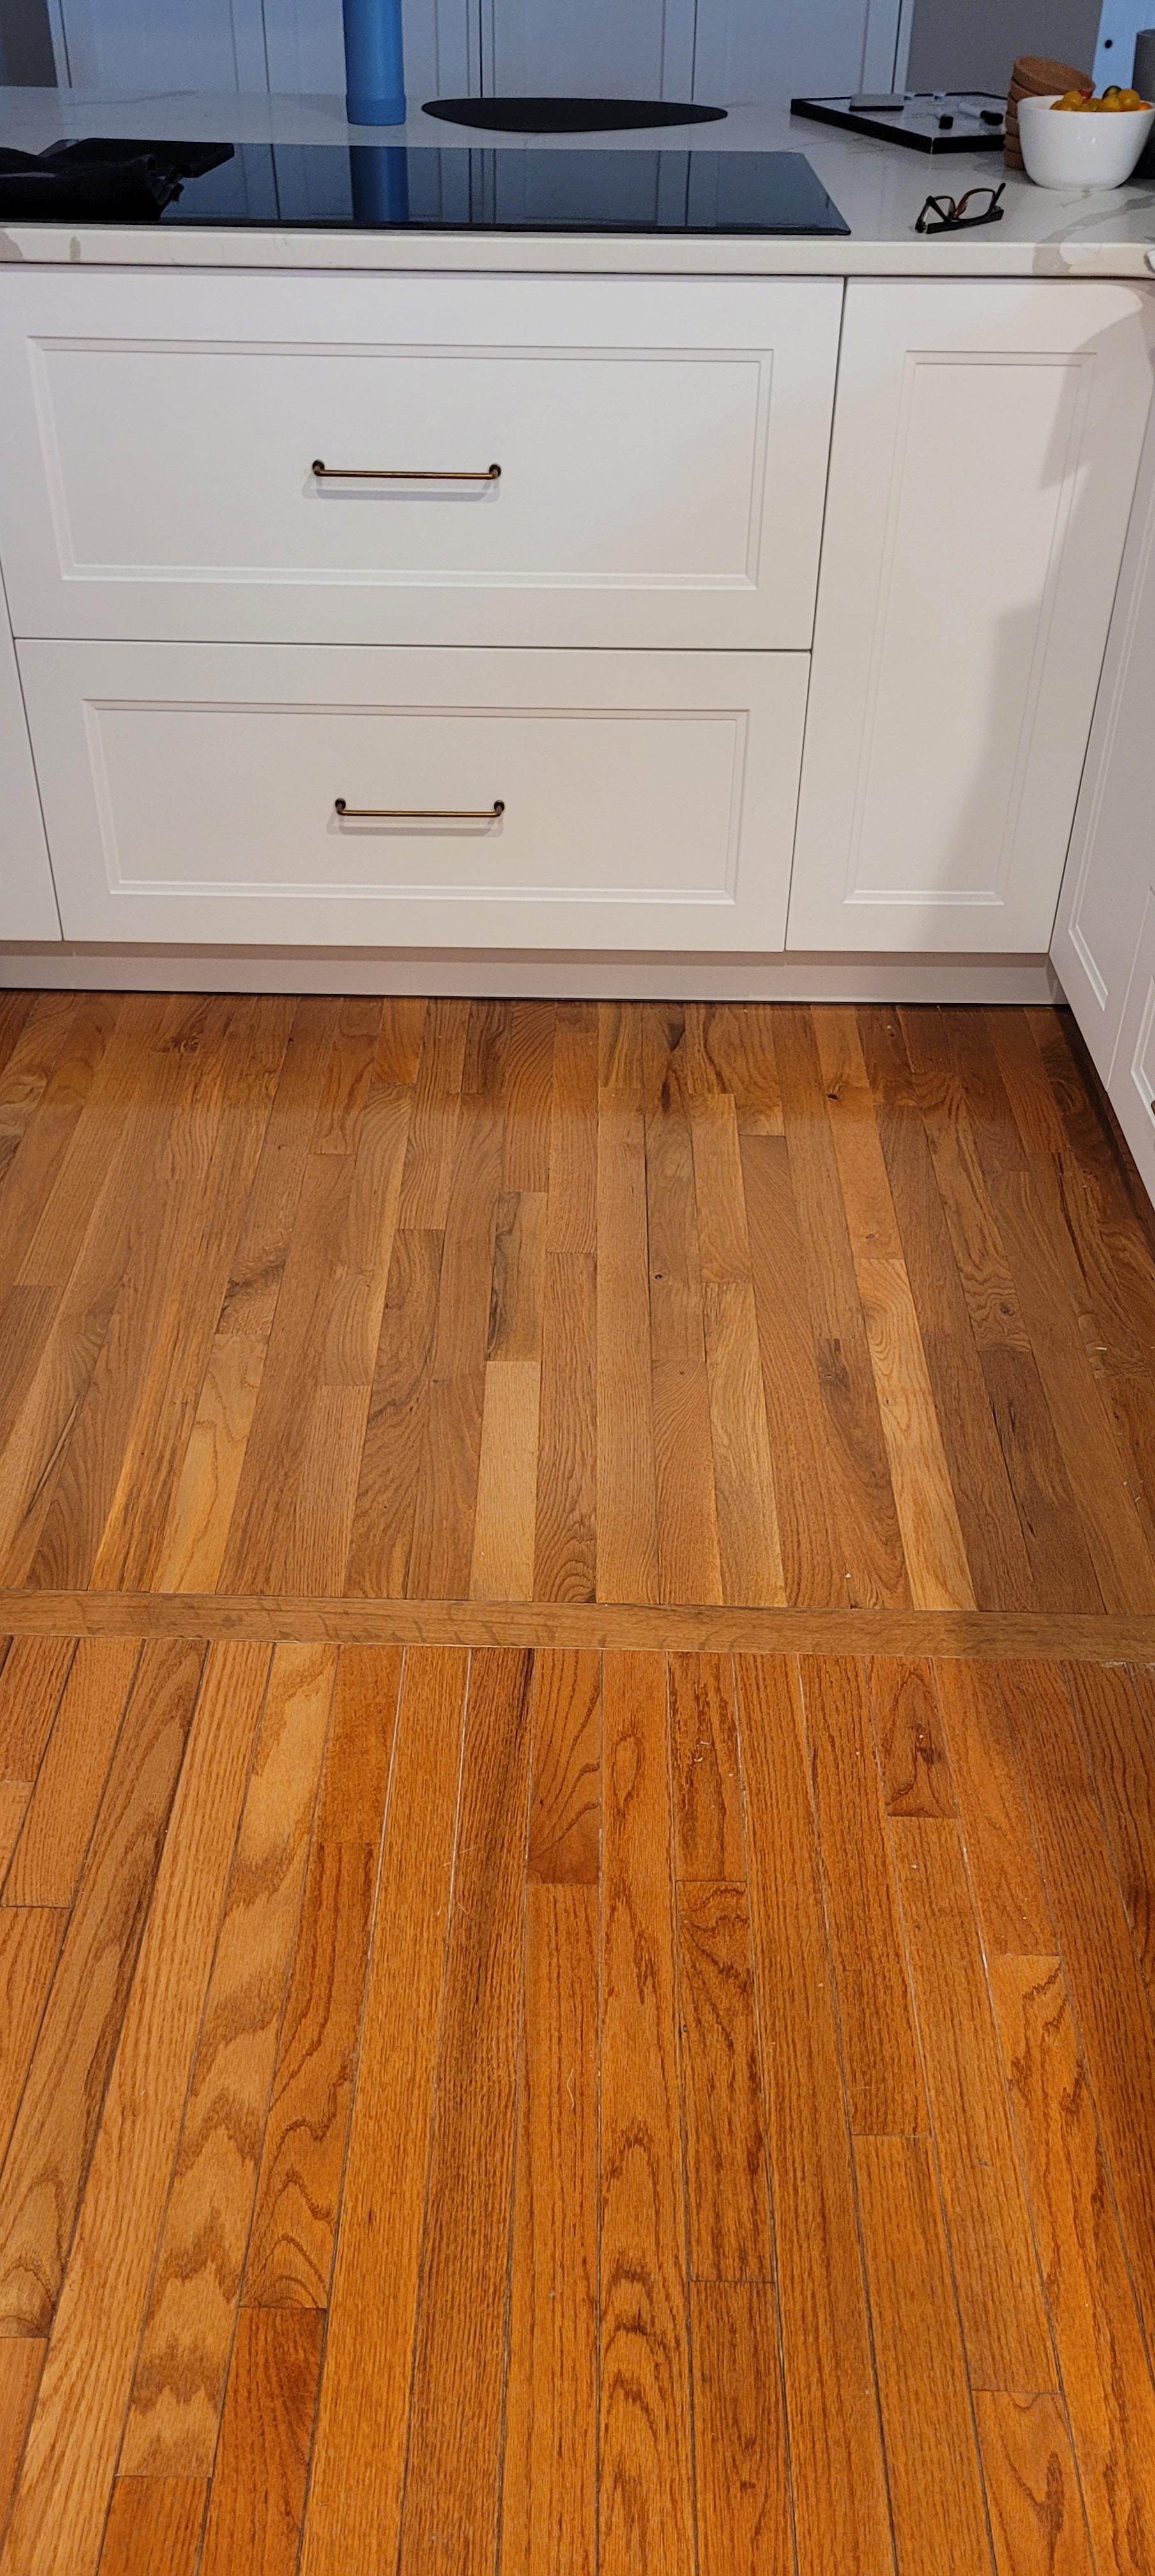
We waited a long time for the wood to arrive and when it did, we brought the boxes into the house to acclimate. We doublechecked the model number and color code on each and every box.
You know what we didn’t do? We didn’t open any of the boxes ahead of time to look at a dang piece of wood. In fact, it never even occurred to us that the color would be so dramatically different even though it is the same product.
On that fateful day, with flooring guys in their knee pads looking to us to make a spur-of-the-moment call on what to do, we asked them to lay as much of the brand new flooring under the island as possible (sigh.)
Insult to injury came when they said they could not “lace” the two floors together. I think it coulda been done and I regret not nudging a little more forcefully. I can only say we were still in shock at seeing the two different colors side by side to pay much attention to the HORI-FLIPPING-ZONTAL line that is now in the galley part of our kitchen.
It is not impossible to fix, but I’ve ordered a swanky washable runner that will look lovely in the meantime. That will have to do, peanut, that will have to do.
None of the above regrets are irreversible, but all will take a little sweat equity to fix.
The shelves are a whole different story and deserve their own feature post titled BIG FAT FLIPPING FLOATING SHELF HEADACHE.
The short version — we installed the posts onto which the shelves will slide before the tile was installed. That was smart — everyone said so, from the post-seller guy (?!), to the gazillions of pros we peppered with questions.
The posts that went in were as level as the day is long. The tilers tiled around them and we were to do the next part — drilling the holes in the back of our 2.5″ shelves — on our own. It was supposed to be time-consuming, but easy, especially since we purchased a drilling jig from the same post-making company. We (smartly) used a scrap piece of wood first to practice.
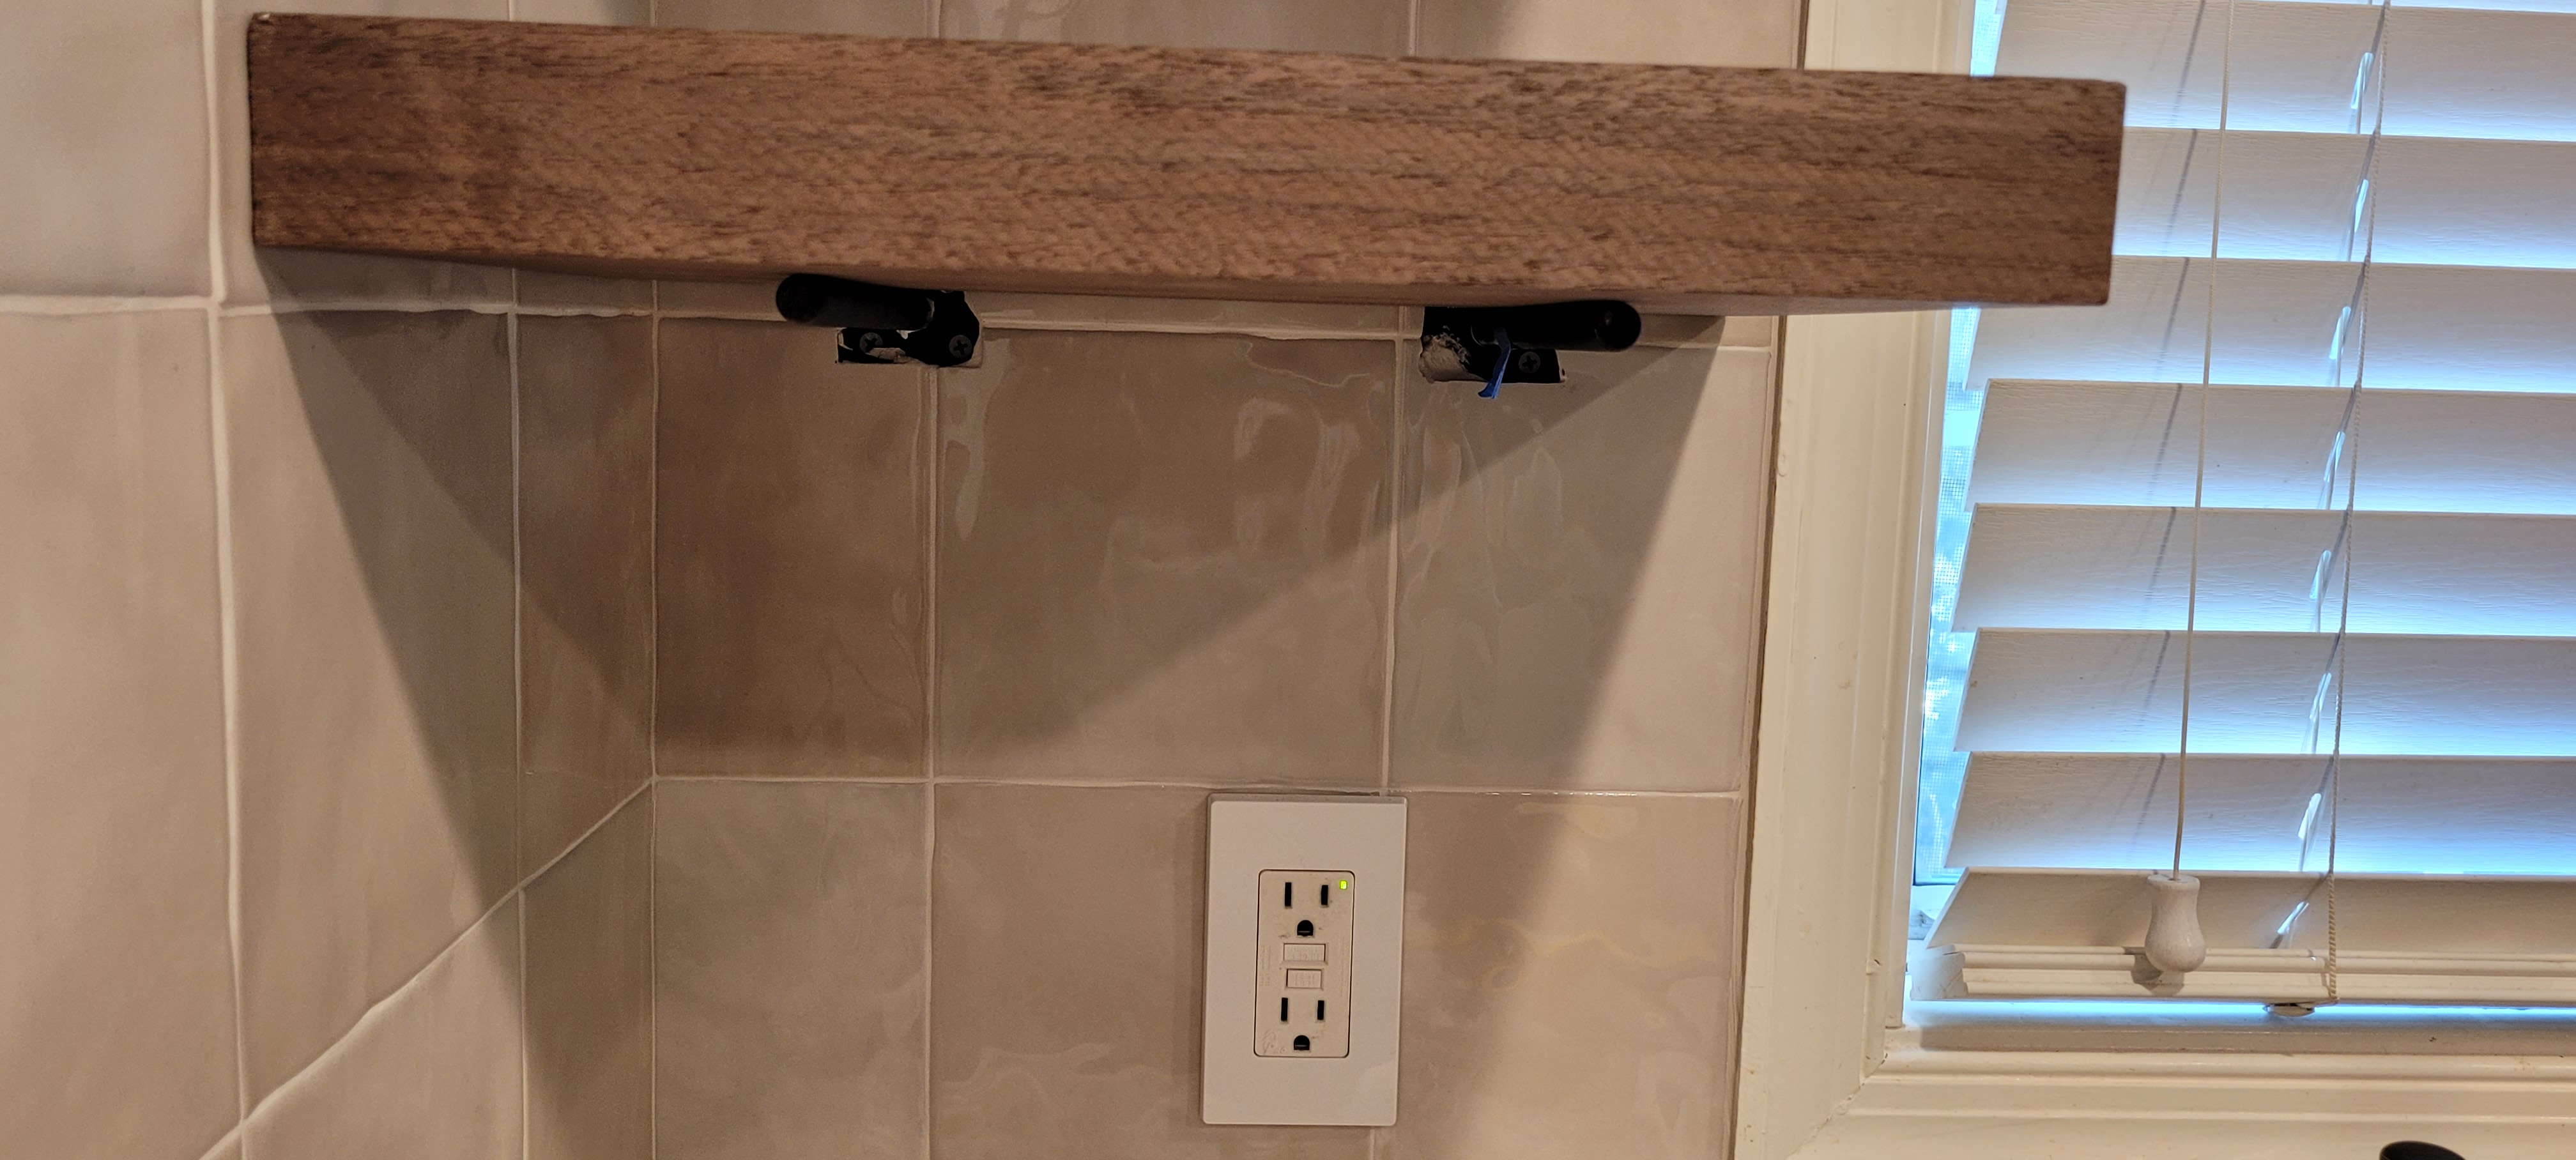
The holes, even with the jig, are not straight enough to slide onto the posts. Or maybe the posts aren’t straight enough to slide into the holes. Either way, nothing is sliding anywhere.

We thought hard, and came up with what we thought was an ingenious fix — making the holes a little bit larger to accommodate any crookedness from the posts. Hard NOPE.
And worse, the larger drill bit wasn’t long enough to go 8″ into our 11″ shelves. So, we ordered an extender for the drill bit. But the extender didn’t fit our drill.
Now we are in the process of ordering our third drill bit and our fears are growing that we may have to damage our brand new tile to reposition the posts or just scrap the ‘hole’ kit and kaboodle, and start fresh.
My head hurts.
