
With just 30 days left, give or take, before we hit the year** mark on our kitchen renovation project, we are scrambling to finish the last item on our checklist.
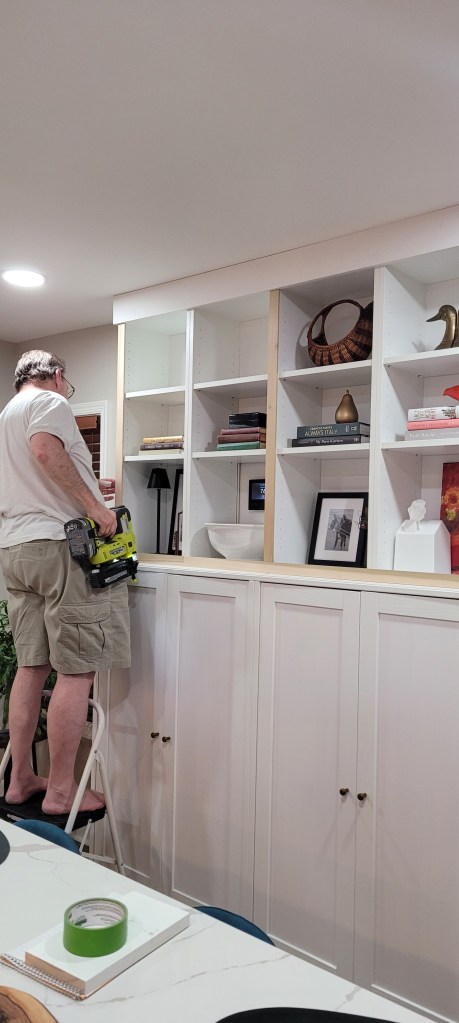
We lovingly call this unit the beast, and the nickname has proven true to form with all of the steps (and time) involved in getting this thing built. These utility cabinets were in the original renderings for the kitchen, but we always knew we would wait until everything else was completed to tackle this baby.
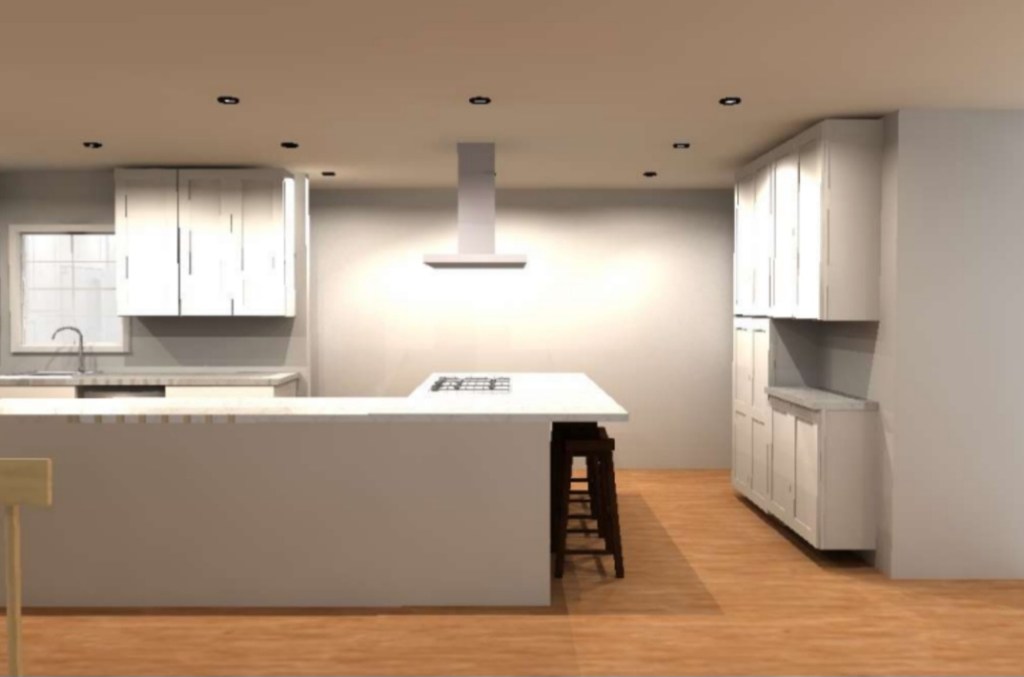
Rather than go with the same cabinetry we chose for the rest of our kitchen, we wanted to hold off purchasing these utility cabinets until we saw what kind of space we would have left after the massive island was set in place.
We weren’t sure whether we could do a full 24-in depth on the utility cabinet, a 16-in depth, or even less. What we did know was that we wanted plenty of walkway space behind the stools that faced the rest of the kitchen. Nothing makes a room look smaller than inadequate space to walk! And, nobody loves being stuck at the far end of a counter, not being able to squeeze by others who are sitting there.
So, we wanted to leave a full 3 to 4 feet of walkway space and just couldn’t get picture what that would feel like until the kitchen was relatively finished.
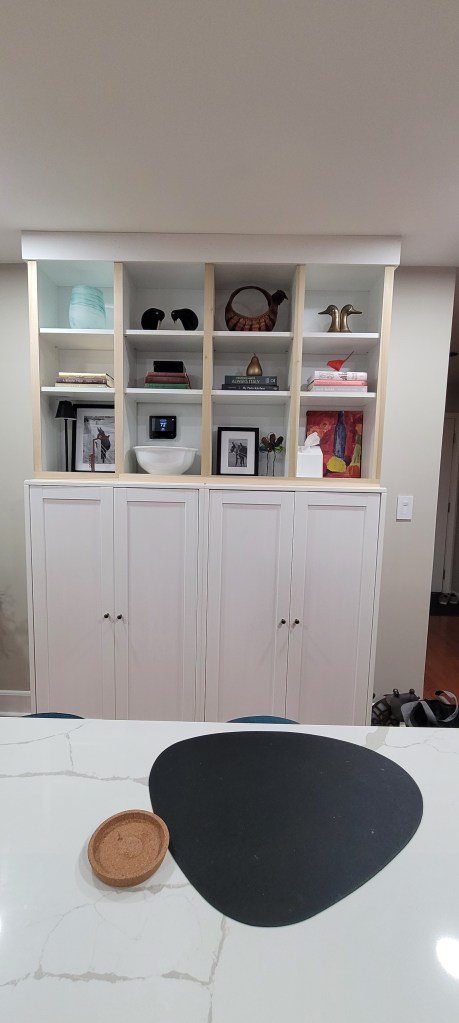
We are so glad we waited because the configuration changed, as did the depth of the cabinets, once we got a glimpse of what we had to work with in terms of space. In order to accommodate the spacious walkway behind the stools, we ended up with a 15-in utility cabinet depth, something we would never have considered had we ordered cabinets all at once.
We found the idea/hack from a bunch of different DIY bloggers to use several different IKEA pieces to form built-in cabinetry using solid wood IKEA Havsta cabinets topped with less expensive Billys.
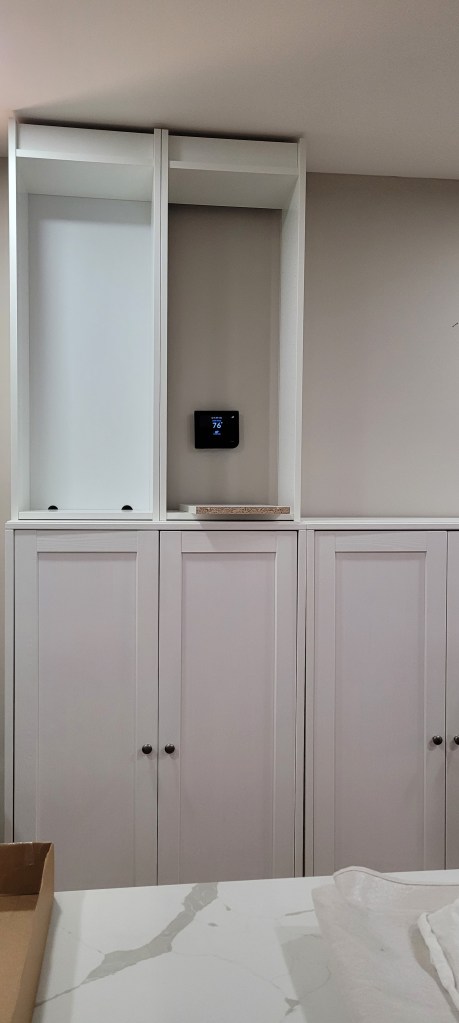
Once we set the cabinets in place — we used two Havsta cabinets and four Billys — we knew we would have to complete the baseboards first. In order for these to look as “built in” as possible, we removed the baseboards behind the cabinet so they could fit snug against the wall.
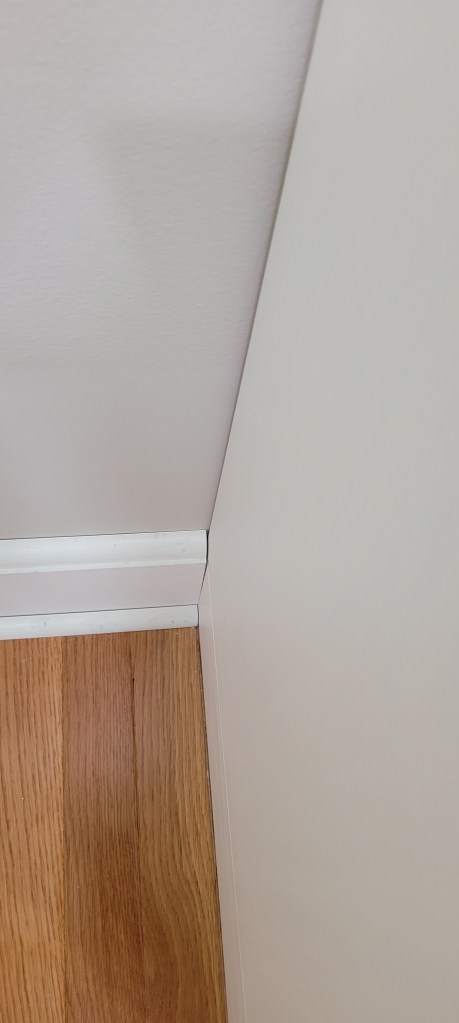
“Snug” would be actually be a luxury as we have very crooked walls, but we accommodated their quirkiness as much as possible, knowing caulk will solve the rest.
Next, we turned the Billy cabinets upside down so their bases would form a nice backing to attach some crown molding, and then bolted everything together from the inside. (Scroll up a few photos to see the upside down Billys before they got crowned.)


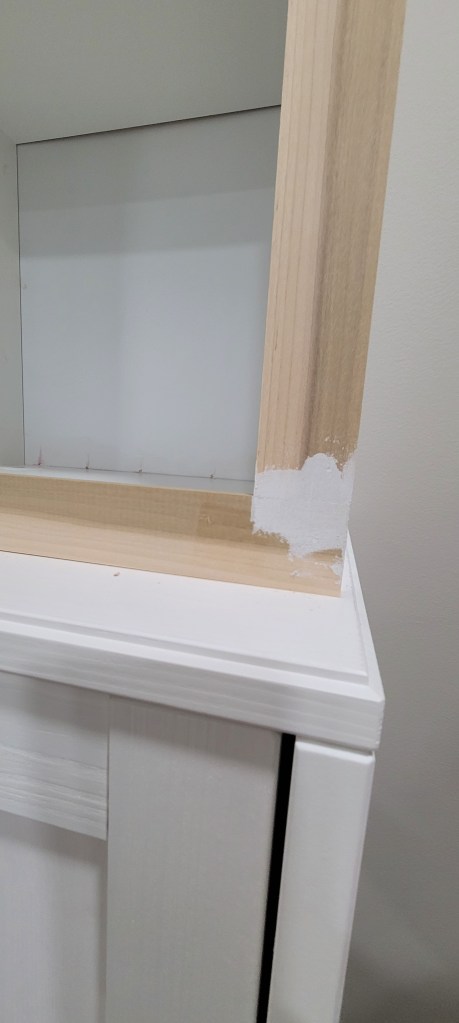
The next step was adding trim which really helps drive home the built-in look. We used 2-in wide unfinished pieces of oak which we found online.
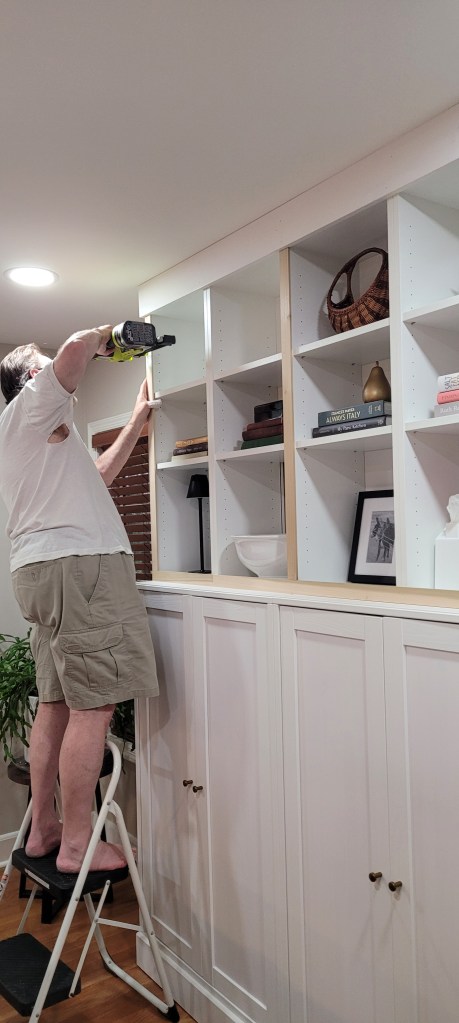

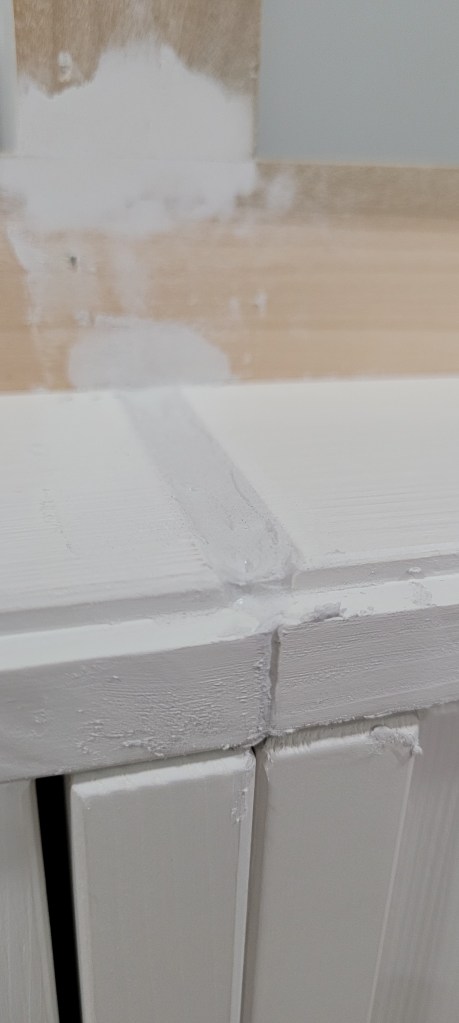
Then, it was on to using wood filler to fill in all the spaces where wood met wood, spackling all of the shelf holes which took weeks, if we are being honest. Not the favorite task of the project, but one that also will help visually declutter the look of the unit.
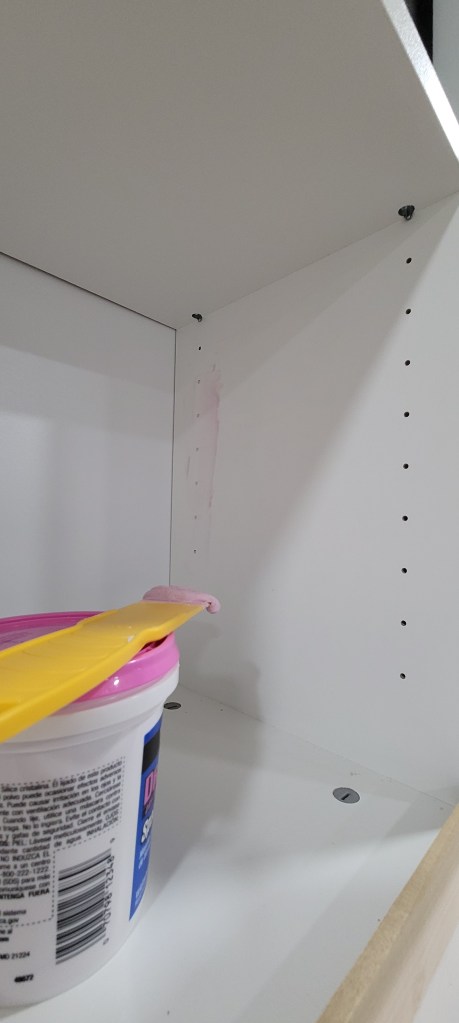

We also spackled the deep crevices which were created when we smushed the two base cabinets together. Again, this is to make a seamless built-in look. In the photo below, you can see that we filled it partially. Let it dry for a day or so, sanded, and then came back and filled it again with spackle. We repeated that process until the seam was…seamless 🙂 I forgot to snap a photo of that, but the proof will be in the pudding when the finished cabinet is revealed. Fingers crossed.
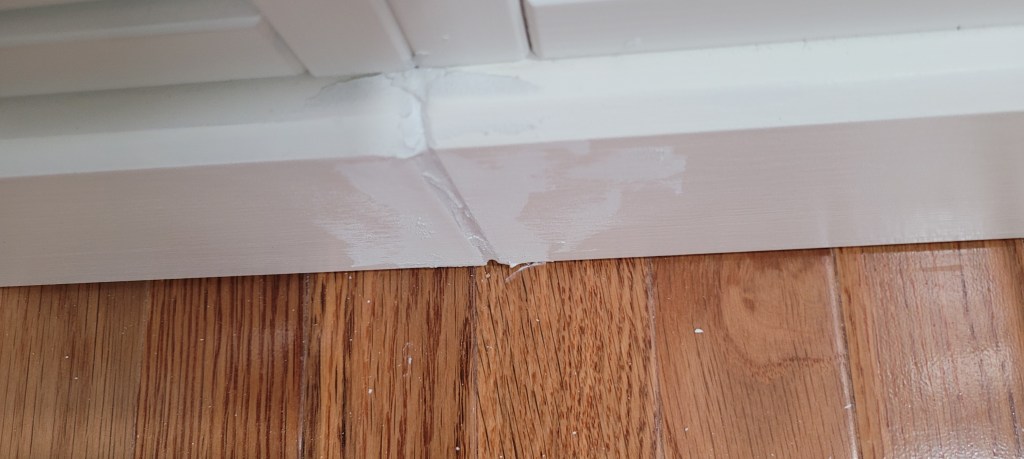
We finally finished sanding everything which is also an exercise in patience-building (one we would like never to repeat!) We are now in the final stages of caulking everything — where the backer board of the Billys meet the side walls, where the Billys meet the Havstas, where the trim meets the crown, and where the base molding meets the Havstas.


As soon as the caulk dries, we will apply an initial coat of shellac primer that must dry and cure for at least two to three days, before applying a second coat. The hardwood cabinets likely would not need that much attention, especially since we ultimately will be painting them white, but Ikea cabinets not made of hardwood — the Billys are some particle board mish-mash — must have a good shellac primer. This will keep the cabinets from easily scuffing and scratching with everyday use.
Once the shellac is fully cured, a step that will take at least the next four to five days, the whole thing will get two coats of Behr Premium White Matte — Scuff Defense (which the internet tells us is the closest match to the color cabinets we have in the rest of the kitchen). Note to Ikea: Here’s an idea for a money making endeavor. Sell paint to match your products!
Once the beast is done and dusted, we can confidently say we are finished. (Unless you count the punch list — boy, do we have a punch list…!) But, we think, if luck is on our side, we may have some before and after pictures to share by the end of the summer. I know you’ve heard it before, but this time we think it’s gonna happen 😊
**The project ‘year’ anniversary changes depending on our mood! It is true that our house became a storage locker for cabinets that were delivered last July. But we did not start pulling up the floors until September, so we are still on our game.
